The Avaza team has been hard at work upgrading the look and feel of Avaza for the last few months. One of the main changes you’ll see as soon as you open a project is the new and improved task List view.
Tasks are the heartbeat of Avaza projects. Work is created, estimated, assigned, collaborated on and delivered via tasks. While this view will look similar to you, we’ve made quite a few changes to help you get through your task list faster.
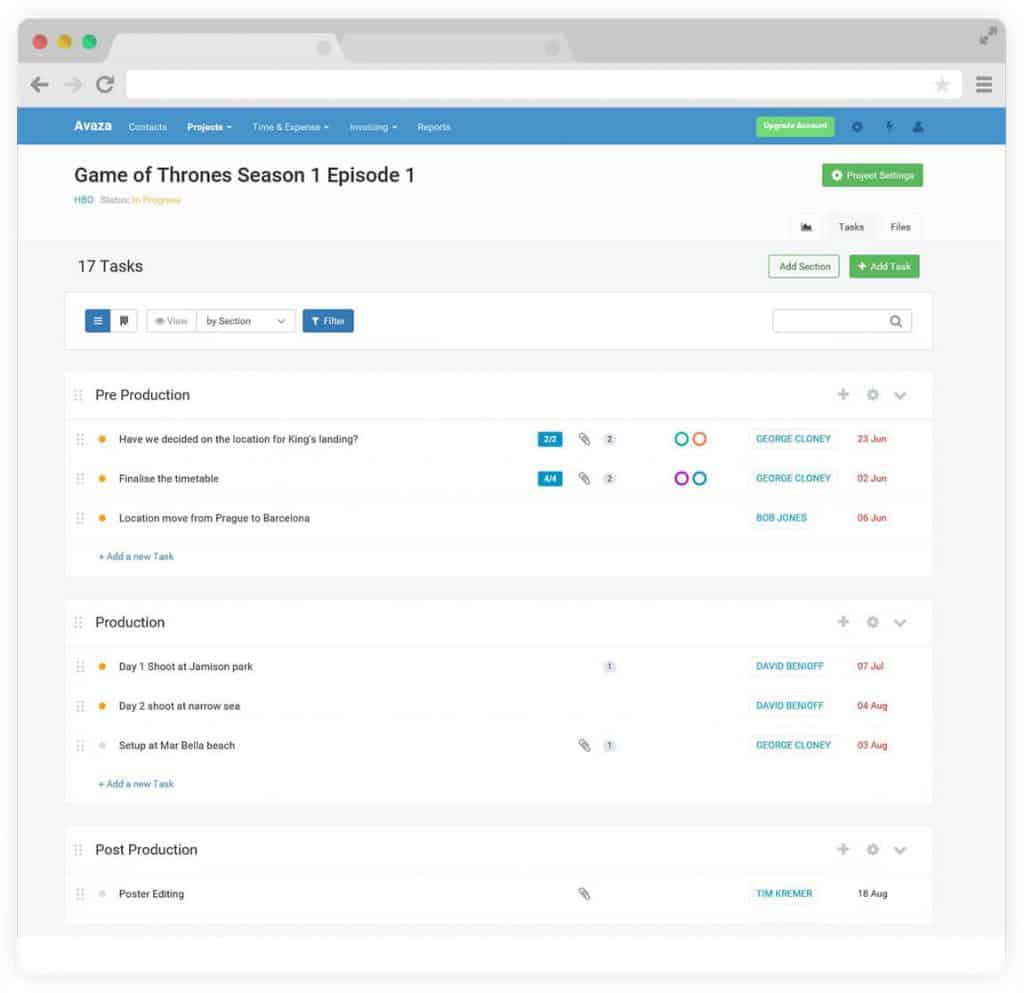
Figure: View Project Tasks in List-View
1. Create Tasks in List View
When you’re creating a project task list, sometimes you want to be able to add a number of tasks in quick succession to the same section. You can now add a task in one of three ways:
- The +Add Task button on the top right
- The + icon at the top of each section
- The +Add a New Task option at the bottom of your task list allows you to add tasks as quickly as you would in an excel sheet.
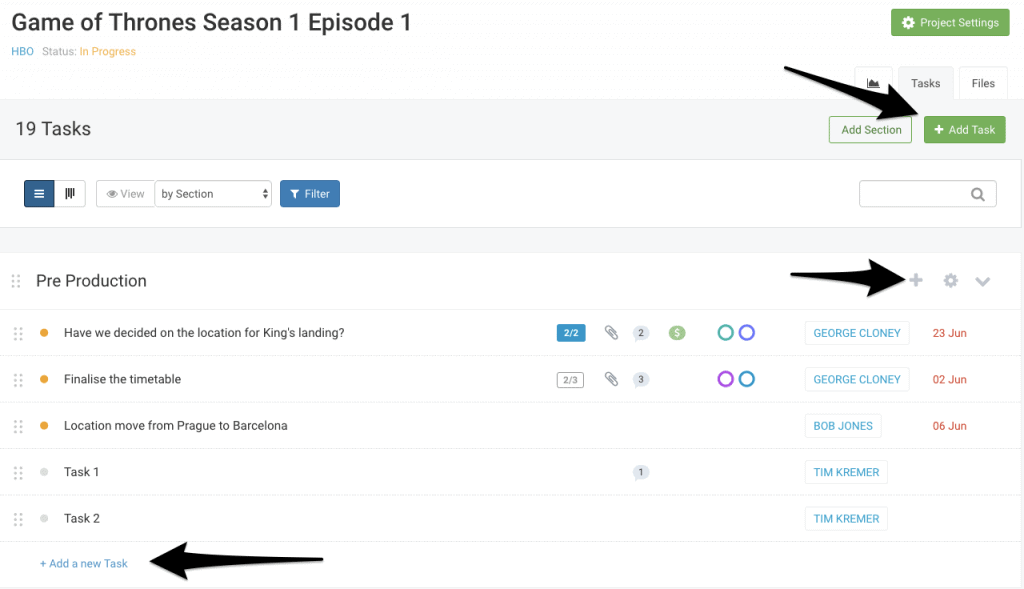
Figure: Create Tasks in One of Three Ways
The +Add a New Task option will help you add tasks as quickly as you would in a word document or excel sheet, so you can go ahead and list down all the things that need to be done in quick-fire mode and come back later to make any edits.

Figure: Quickly Create Tasks In-Line
2. Group Tasks in List View
Avaza lets you group tasks by a few different fields. You can choose between Section, Due Date, Assigned To and Status.

Figure: Group Tasks by Section, Due Date, Assigned To and Status
Section
Sections allow you to setup a workflow that allows your team to get work done faster. Whether you use sections to demarcate phases of a project, or even divide tasks between different team functions (like administrative, design, writing etc), sections allow you to setup a workflow customized for your company.
Grouping by sections allows you to re-arrange the order of the sections, access section settings and re-arrange tasks within each section using drag & drop. Tasks grouped by section display three buttons to the right of the section title. These buttons allow you to create tasks quickly, change section settings, and collapse the entire section and its task list.
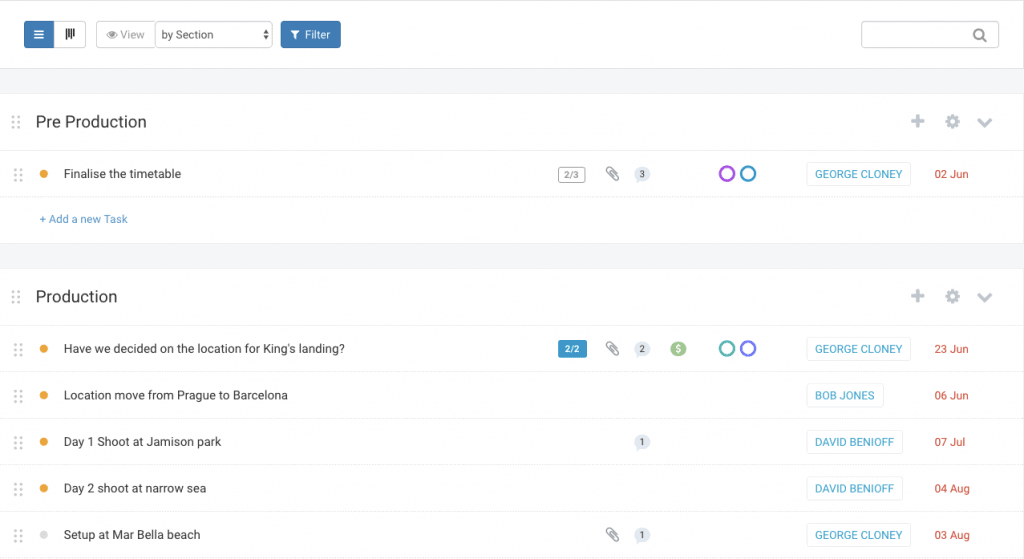
Figure: Group Tasks by Section
Due Date
Grouping by due date lets you view tasks in the order they are due, from earlier to latest. This is most convenient when you want to get a quick overview of where your project stands in terms of how much work is overdue. You can also easily prioritize, or re-assign tasks that need to be completed ASAP because they impact tasks further down the list.
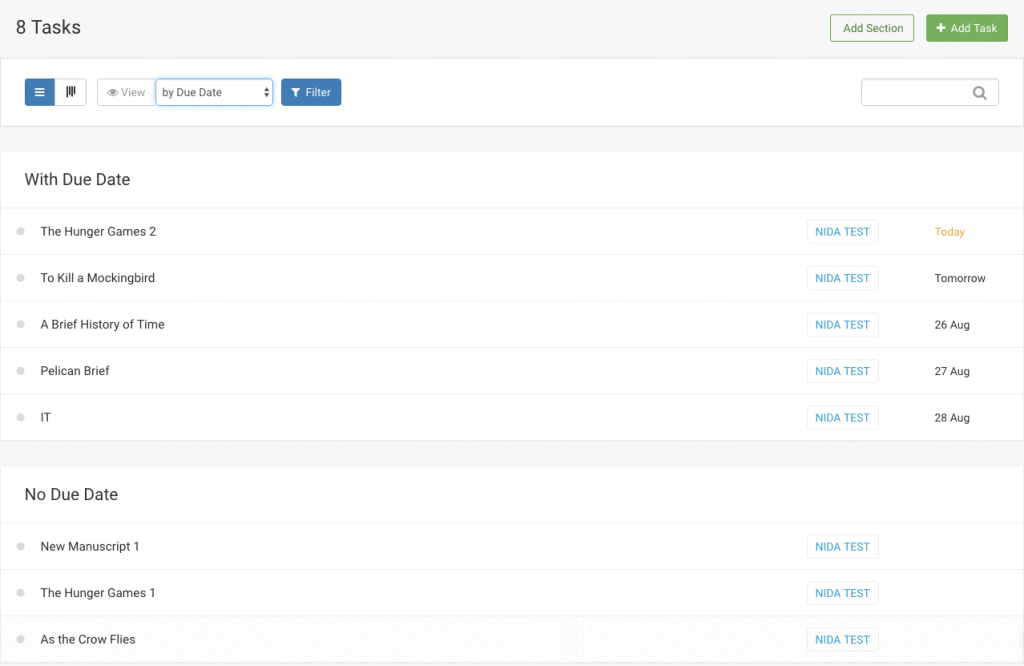
Figure: Group Tasks by Due Date
Assigned To
View tasks by team member they are assigned to. You can drag & drop tasks from one user to another to re-assign them. Grouping by Assigned To allows you to review workload by team member. You may notice when you group tasks this way that one team member has a lot more on their plate than another, and can then quickly reallocate tasks to make workload more even.
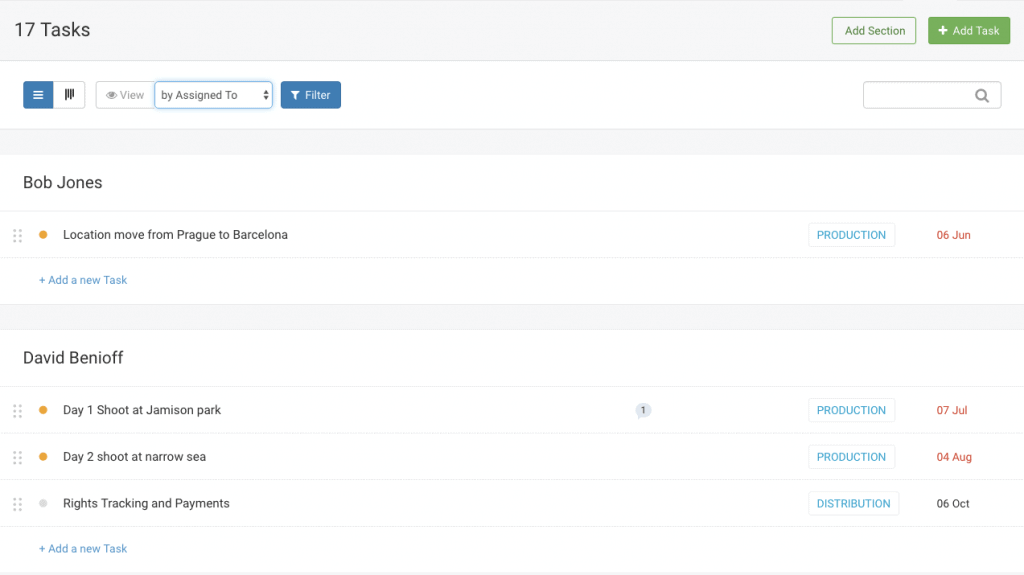
Figure: Group Tasks by Assigned To
Status
View tasks by their status. Drag & drop tasks between statuses to quickly update the status. Being able to at one glance see tasks that are completed, in progress or not started provides you with an eagle eye view of the project.
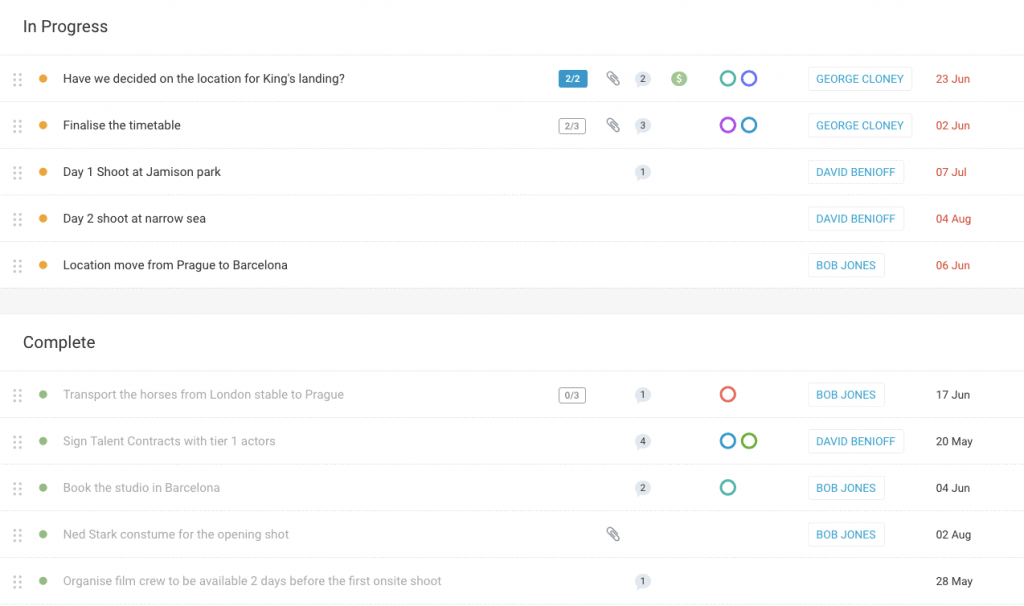
Figure: Group Tasks by Status
3. Use Filters
Overwhelmed by the number of tasks in your list? Quickly filter through them to whittle down your list to a more manageable number.
The Filter pop-up lets you narrow tasks down by Status, Assigned To, Due Date and Tags.
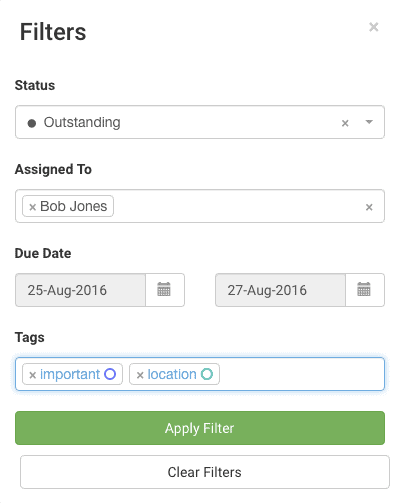
Figure: Filter Tasks by Status, Assigned To, Due Date and Tags
Status
By default this is set to only Outstanding (does not include completed tasks). However, you can decide to filter by other statuses or remove the status filter entirely to view all tasks. As mentioned earlier, being able to filter or group by status lets you quickly understand how much of your project is complete, not started yet or in progress.
Assigned To
Select one or more team members to filter the task list. As with grouping, filtering by team member shows you only tasks assigned to that one person. You can then quickly review how much work they’ve yet to start on, have completed or are currently working on.
Due Date
Select a date range to filter tasks due within those dates to get an overview of how your upcoming weeks are looking. This is a great way to check and see if maybe too much work has been allocated to be completed in one particular week or set of days, allowing you to reschedule it in a more manageable way.
Tags
Select one or more tags to only view tasks that have one or more of those tags applied to them. Tags are great at helping sort through tasks. For example, you can use tags to mark tasks with specific actions that need to be taken, or highlight which part of the project the task is most relevant to. If you’re a design team, you may use tags that highlight where the design is going to be used.
4. Search through Tasks
Another easy way to find tasks quickly is via the improved search function. Available at project-level, you can now find any task within that project without having to scroll through your entire task list.

Figure: Quickly Search Through Tasks
5. Icons Provide you with Task Overview
In our effort to make Avaza more visual, we have added a way for you to view the basic information about a task without having to click on it.

Figure: Get Task Overview from Icons
Task Status

Figure: Task Status Indicator
Colored dots indicate task status in List View. Grey = not started, Orange = In Progress and Green = Completed. Without having to filter or group tasks by status, you can quickly see the status of each task in list view.
Sub-Tasks

Figure: Sub-tasks Icons Shows Number of Total and Completed Sub-Tasks
Once we added sub-tasks, we needed to provide you with a way of ascertaining which task had sub-tasks within it. The Sub-Tasks icon shows you two counts. The first is the number of completed sub-tasks, and the second is the number of total sub-tasks. They are shown in this format x/y. The sub-task icon is displayed in blue if all of them are marked as complete.
Attachments

Figure: Attachment Icon Indicates if there are Attachments on that Task
The paper clip icon in List-view indicates that there are attachments on this task. You can access the attachments by either opening the task, or by going through the files tab.
Comments

Figure: Comments Icon Shows Number of Comments
The speech icon indicates the number of comments on the task.
Fixed Amount

Figure: Fixed Amount Icon Indicates Fixed Amount Payments on that Task
Fixed Amount support is a new feature, and its icon allows you to see which task has fixed amounts also know as milestone payments, attached to it, as well as whether or not they have been invoiced. The icon is blue when the amount is not invoiced, and green once it has been invoiced.
Tags

Figure: Color-Coded Circles Show Tags on Task
Round colored circles indicate tags. List View shows up to 3 tags. You can hover your mouse over a tag to read its title.
Assigned To

Figure: Name of Person Task is Assigned To is Shown in List-View
You can also easily see the name of the person the task is assigned to without having to open the task.
Due Date

Figure: Due Date Indicator Shows Due Date, and is Red when Task is Overdue
The due date for the task is also visible in List view. Once a task is overdue, this is displayed in red.
This is just the beginning in a long line of upgrades to the Project Management module, but we will be sure to keep you updated.