
Avaza QuickBooks Online Integration
Automatically sync Avaza Invoices with QBO via our new integration! The integration supports the following scenarios.
- When an invoice is created in Avaza create the invoice in QuickBooks
- When an invoice is updated in Avaza update the invoice in QuickBooks
- When a payment is applied to an invoice in Avaza, apply the payment to the linked invoice in Quickbooks
- When a payment is applied to an invoice in Quickbooks, apply the payment to the linked invoice in Avaza
The integration also creates new Contacts and Items in Quickbooks if they don’t already exist. We plan to add support for additional scenarios in the future.
Data Flow
During the sync, we pass specific information to and from Quickbooks. The illustration below describes the flow of data between the two systems.

Connect Avaza with Quickbooks
Please follow the steps below to connect your Avaza and Quickbooks accounts.
- Navigate to Settings > Marketplace
- You will find the Quickbooks app in both Feature & Accounting categories.
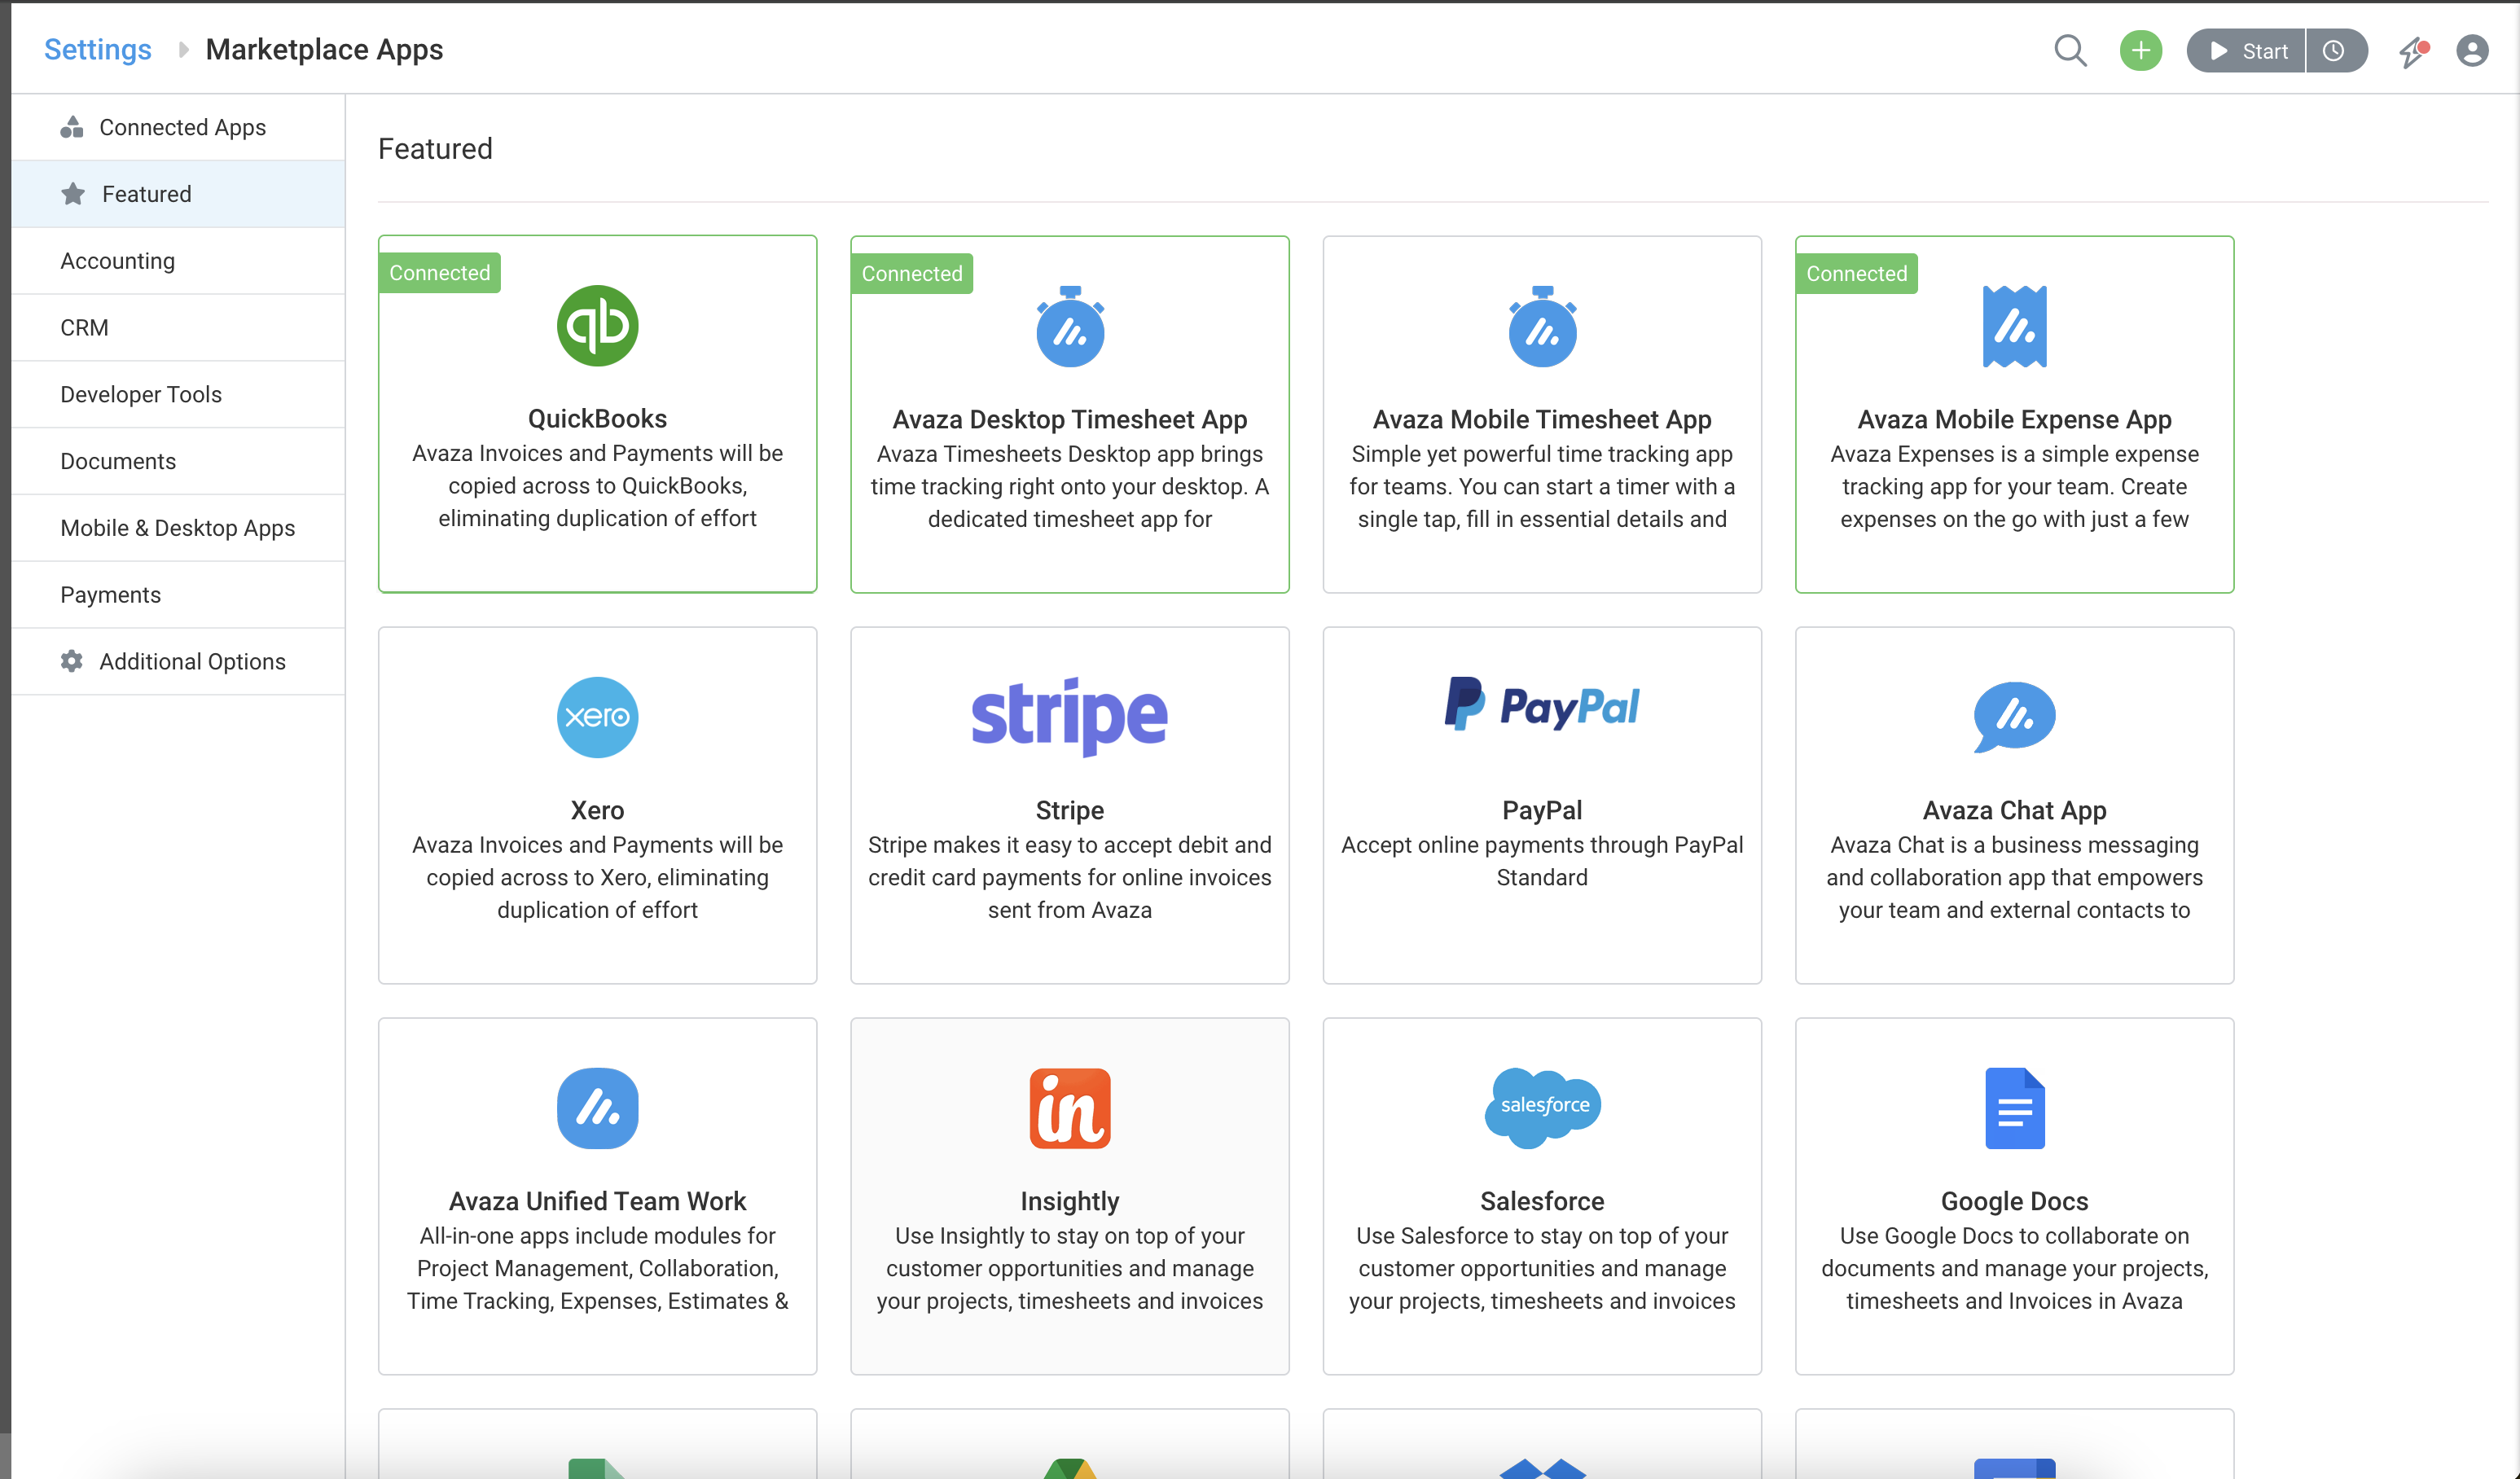
- Click the Quickbooks app to open the details in a modal
- Click the “Connect” button. You will be navigated to the Settings tab.
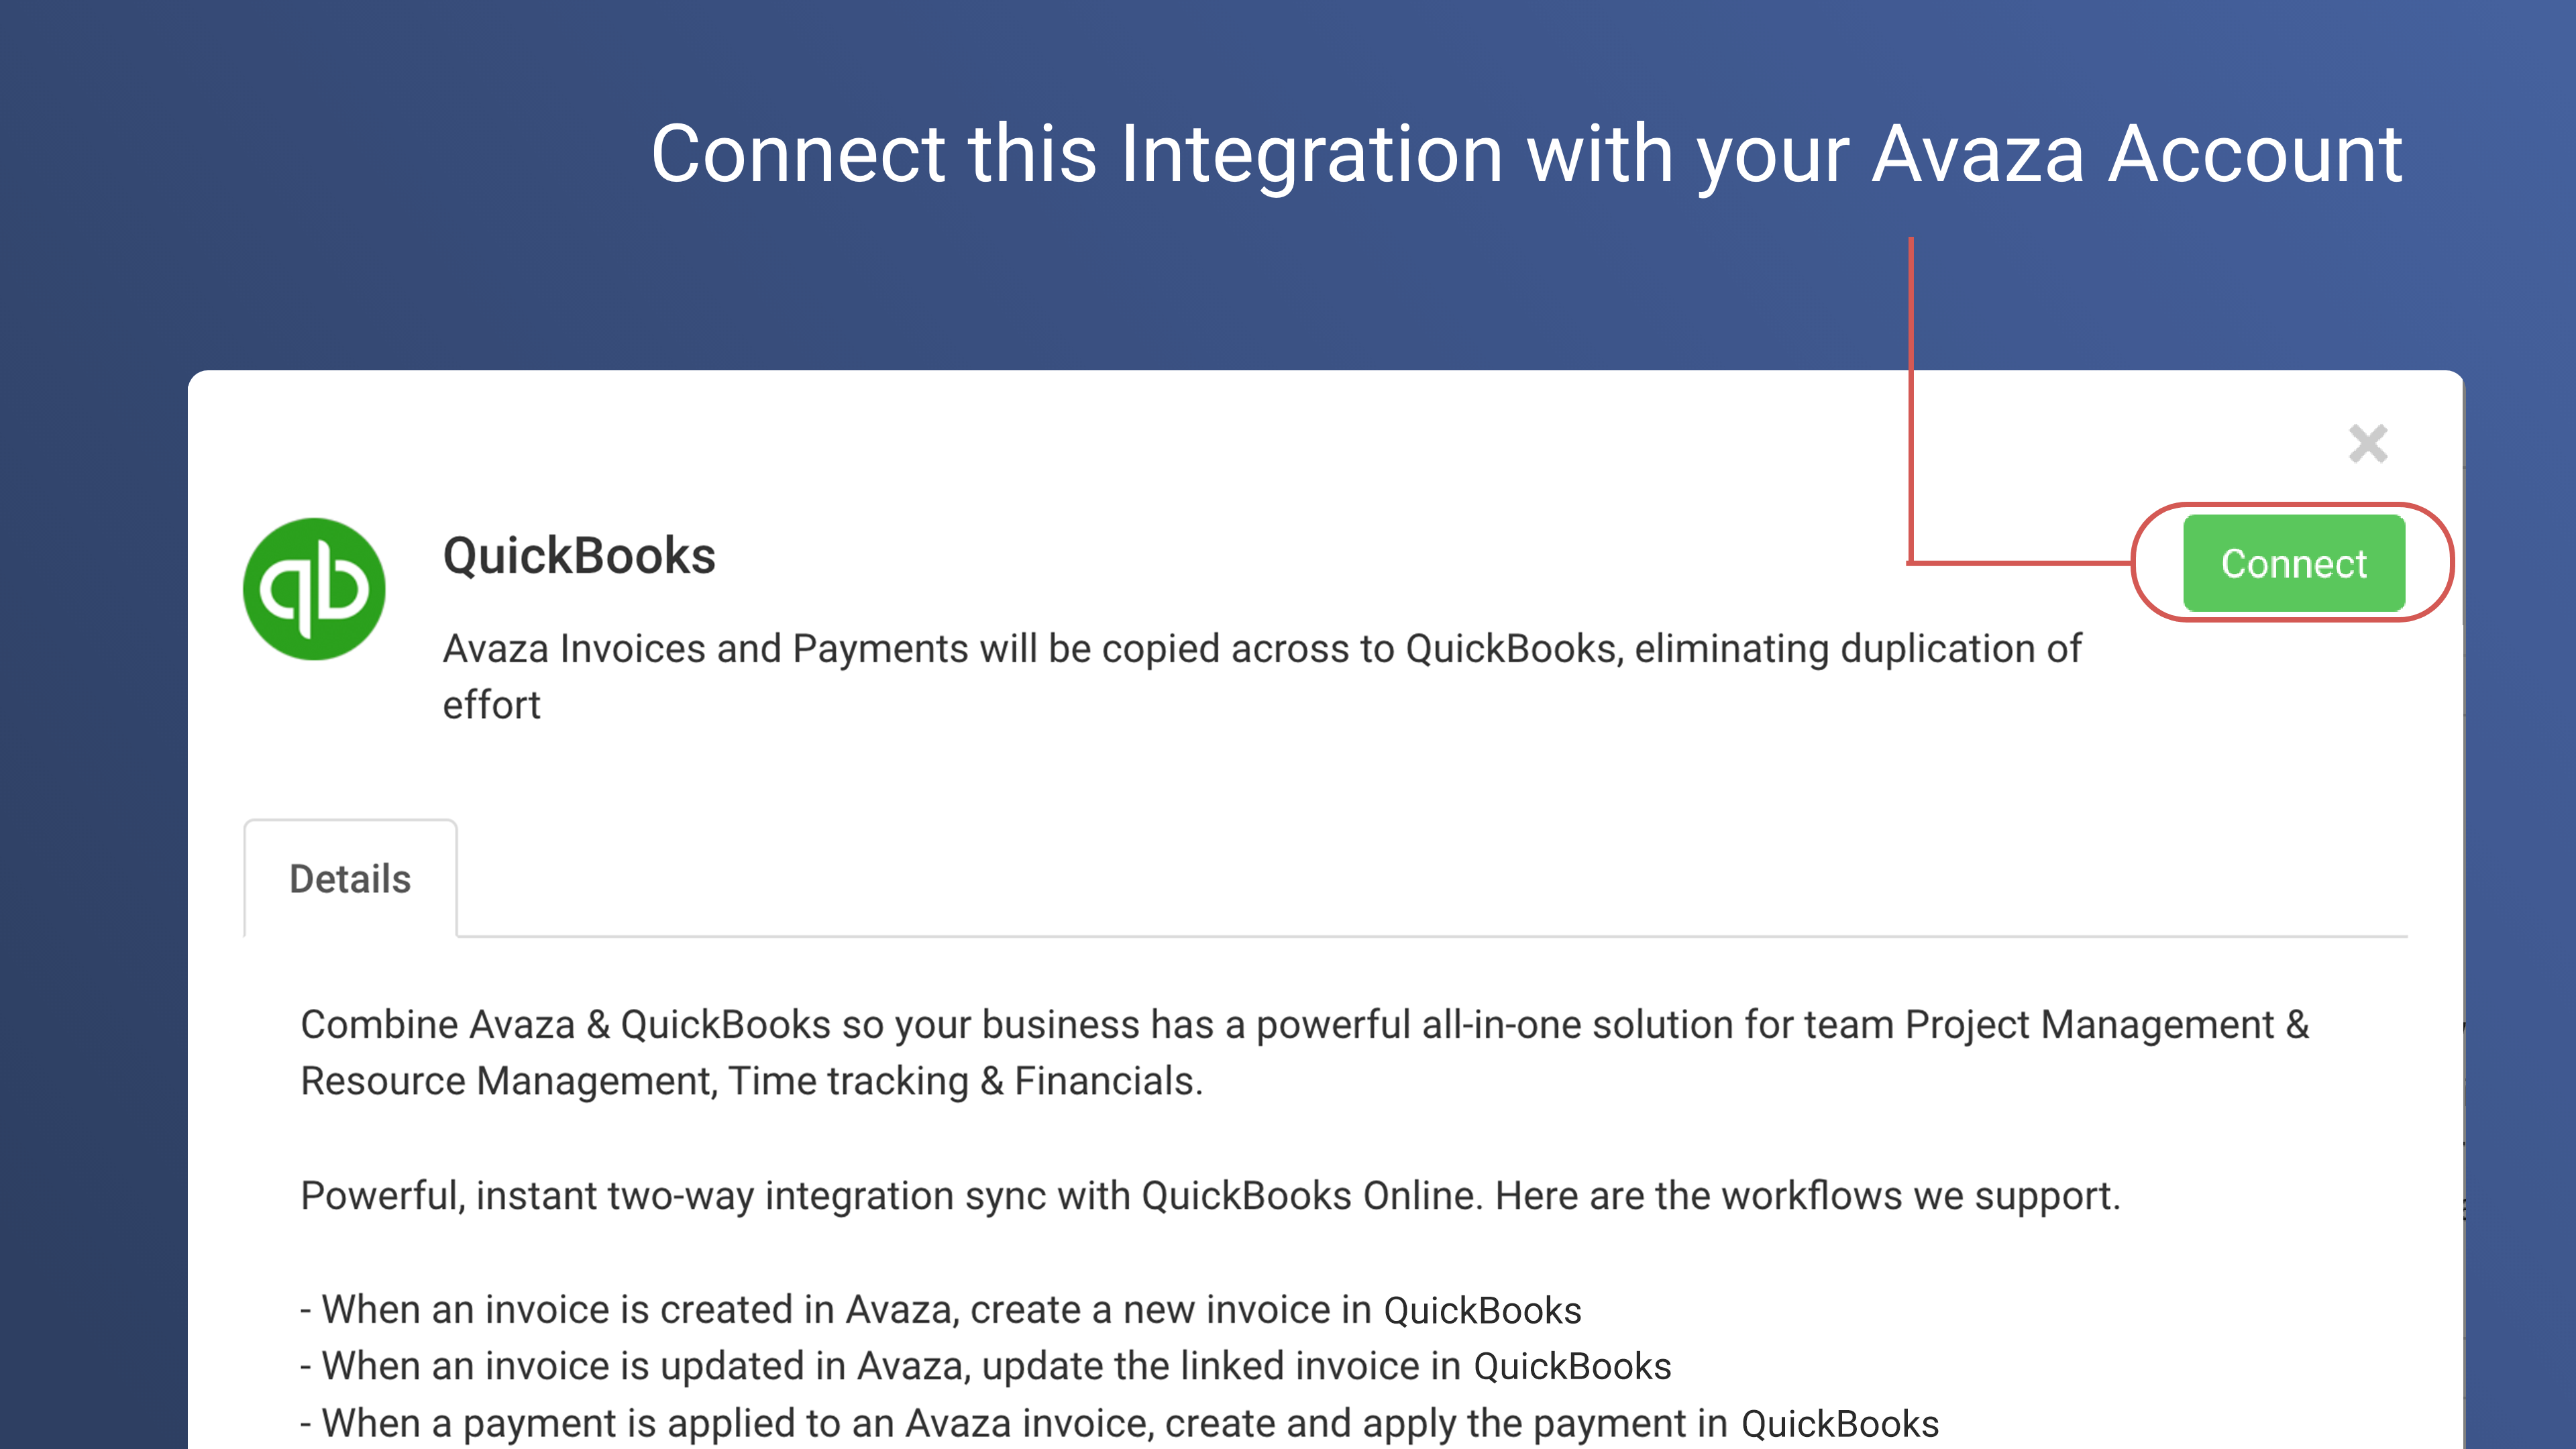
Grant the integration access to your Avaza account by clicking the “Grant Access to Avaza” button.
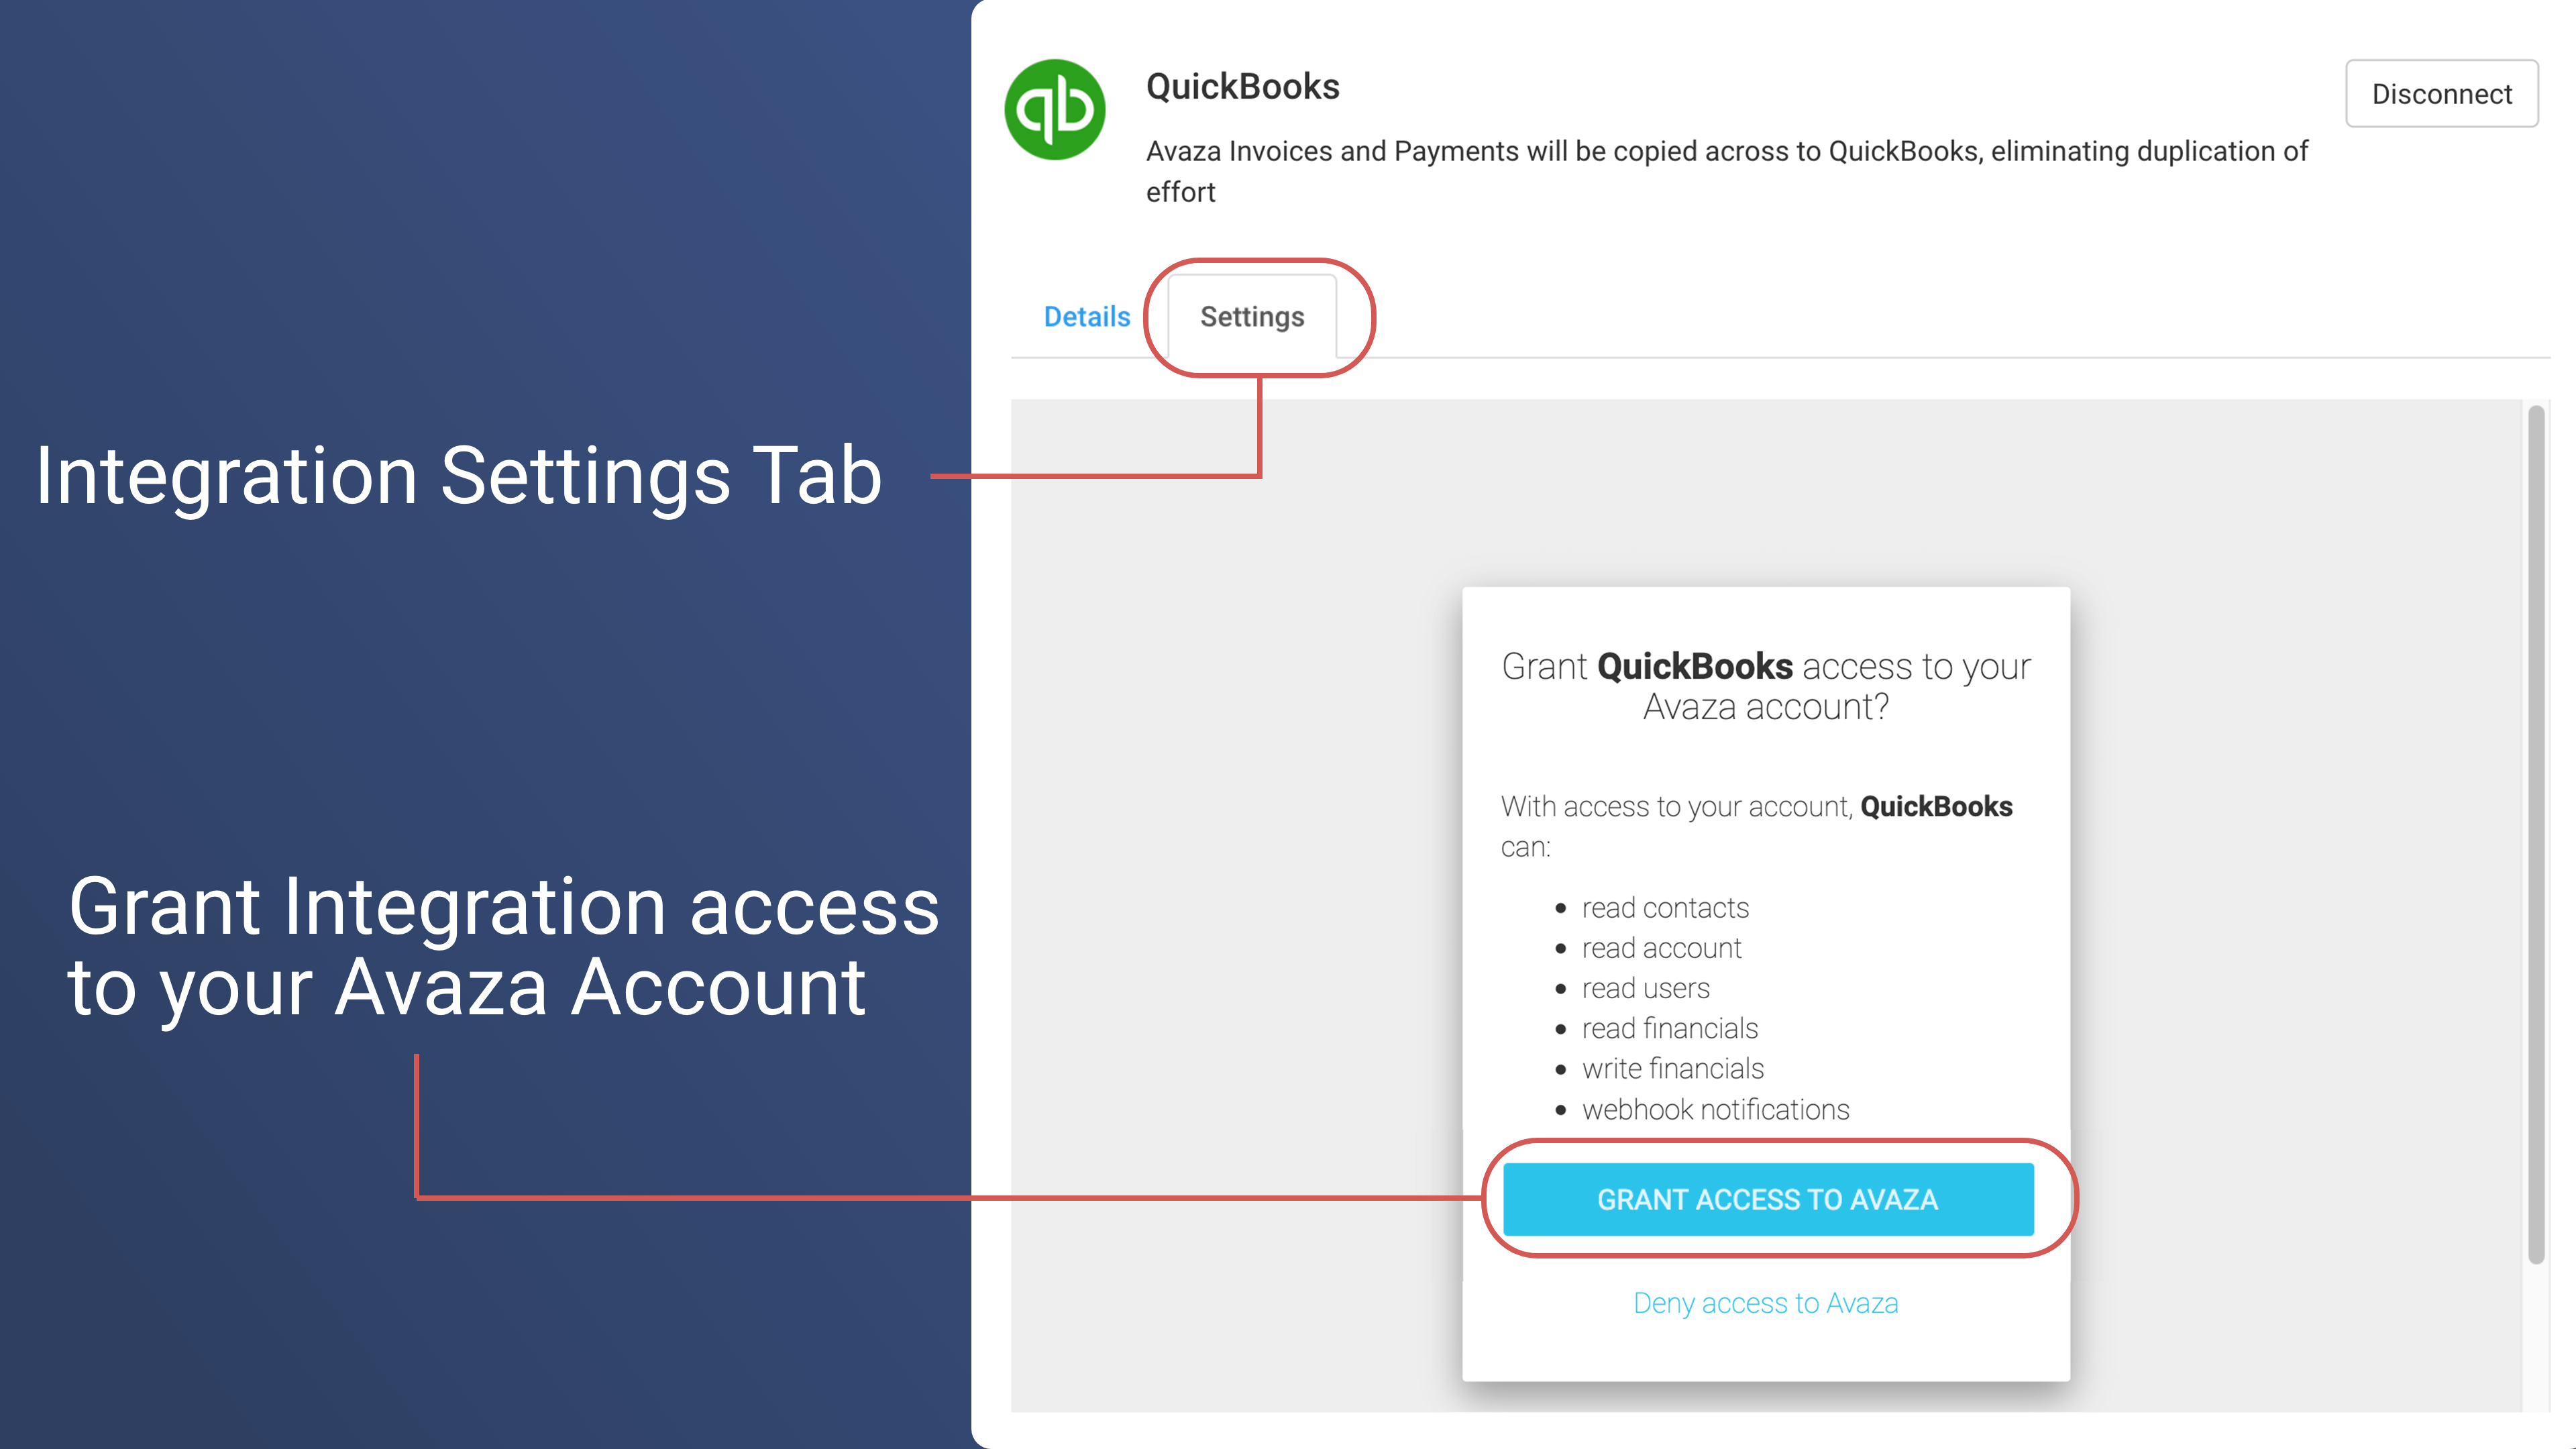
- Once permission to the Avaza account is granted, you will see the details of the Settings screen. Before you can proceed you must connect the integration to one of your Quickbooks accounts.
- Click the “Connect to QuickBooks” button. If you are not already logged in to Quickbooks then it will request you to log in and authorize access to your Quickbooks account. Once authorisation is granted you will return to the Settings page.


Integration Settings
- Under the connection panels, you will see the Integration Settings panel. Please select the Integration Start Date. All Invoices that have been created or updated past the Integration Start Date for Invoices will be copied across to Quickbooks when the integration runs for the first time.
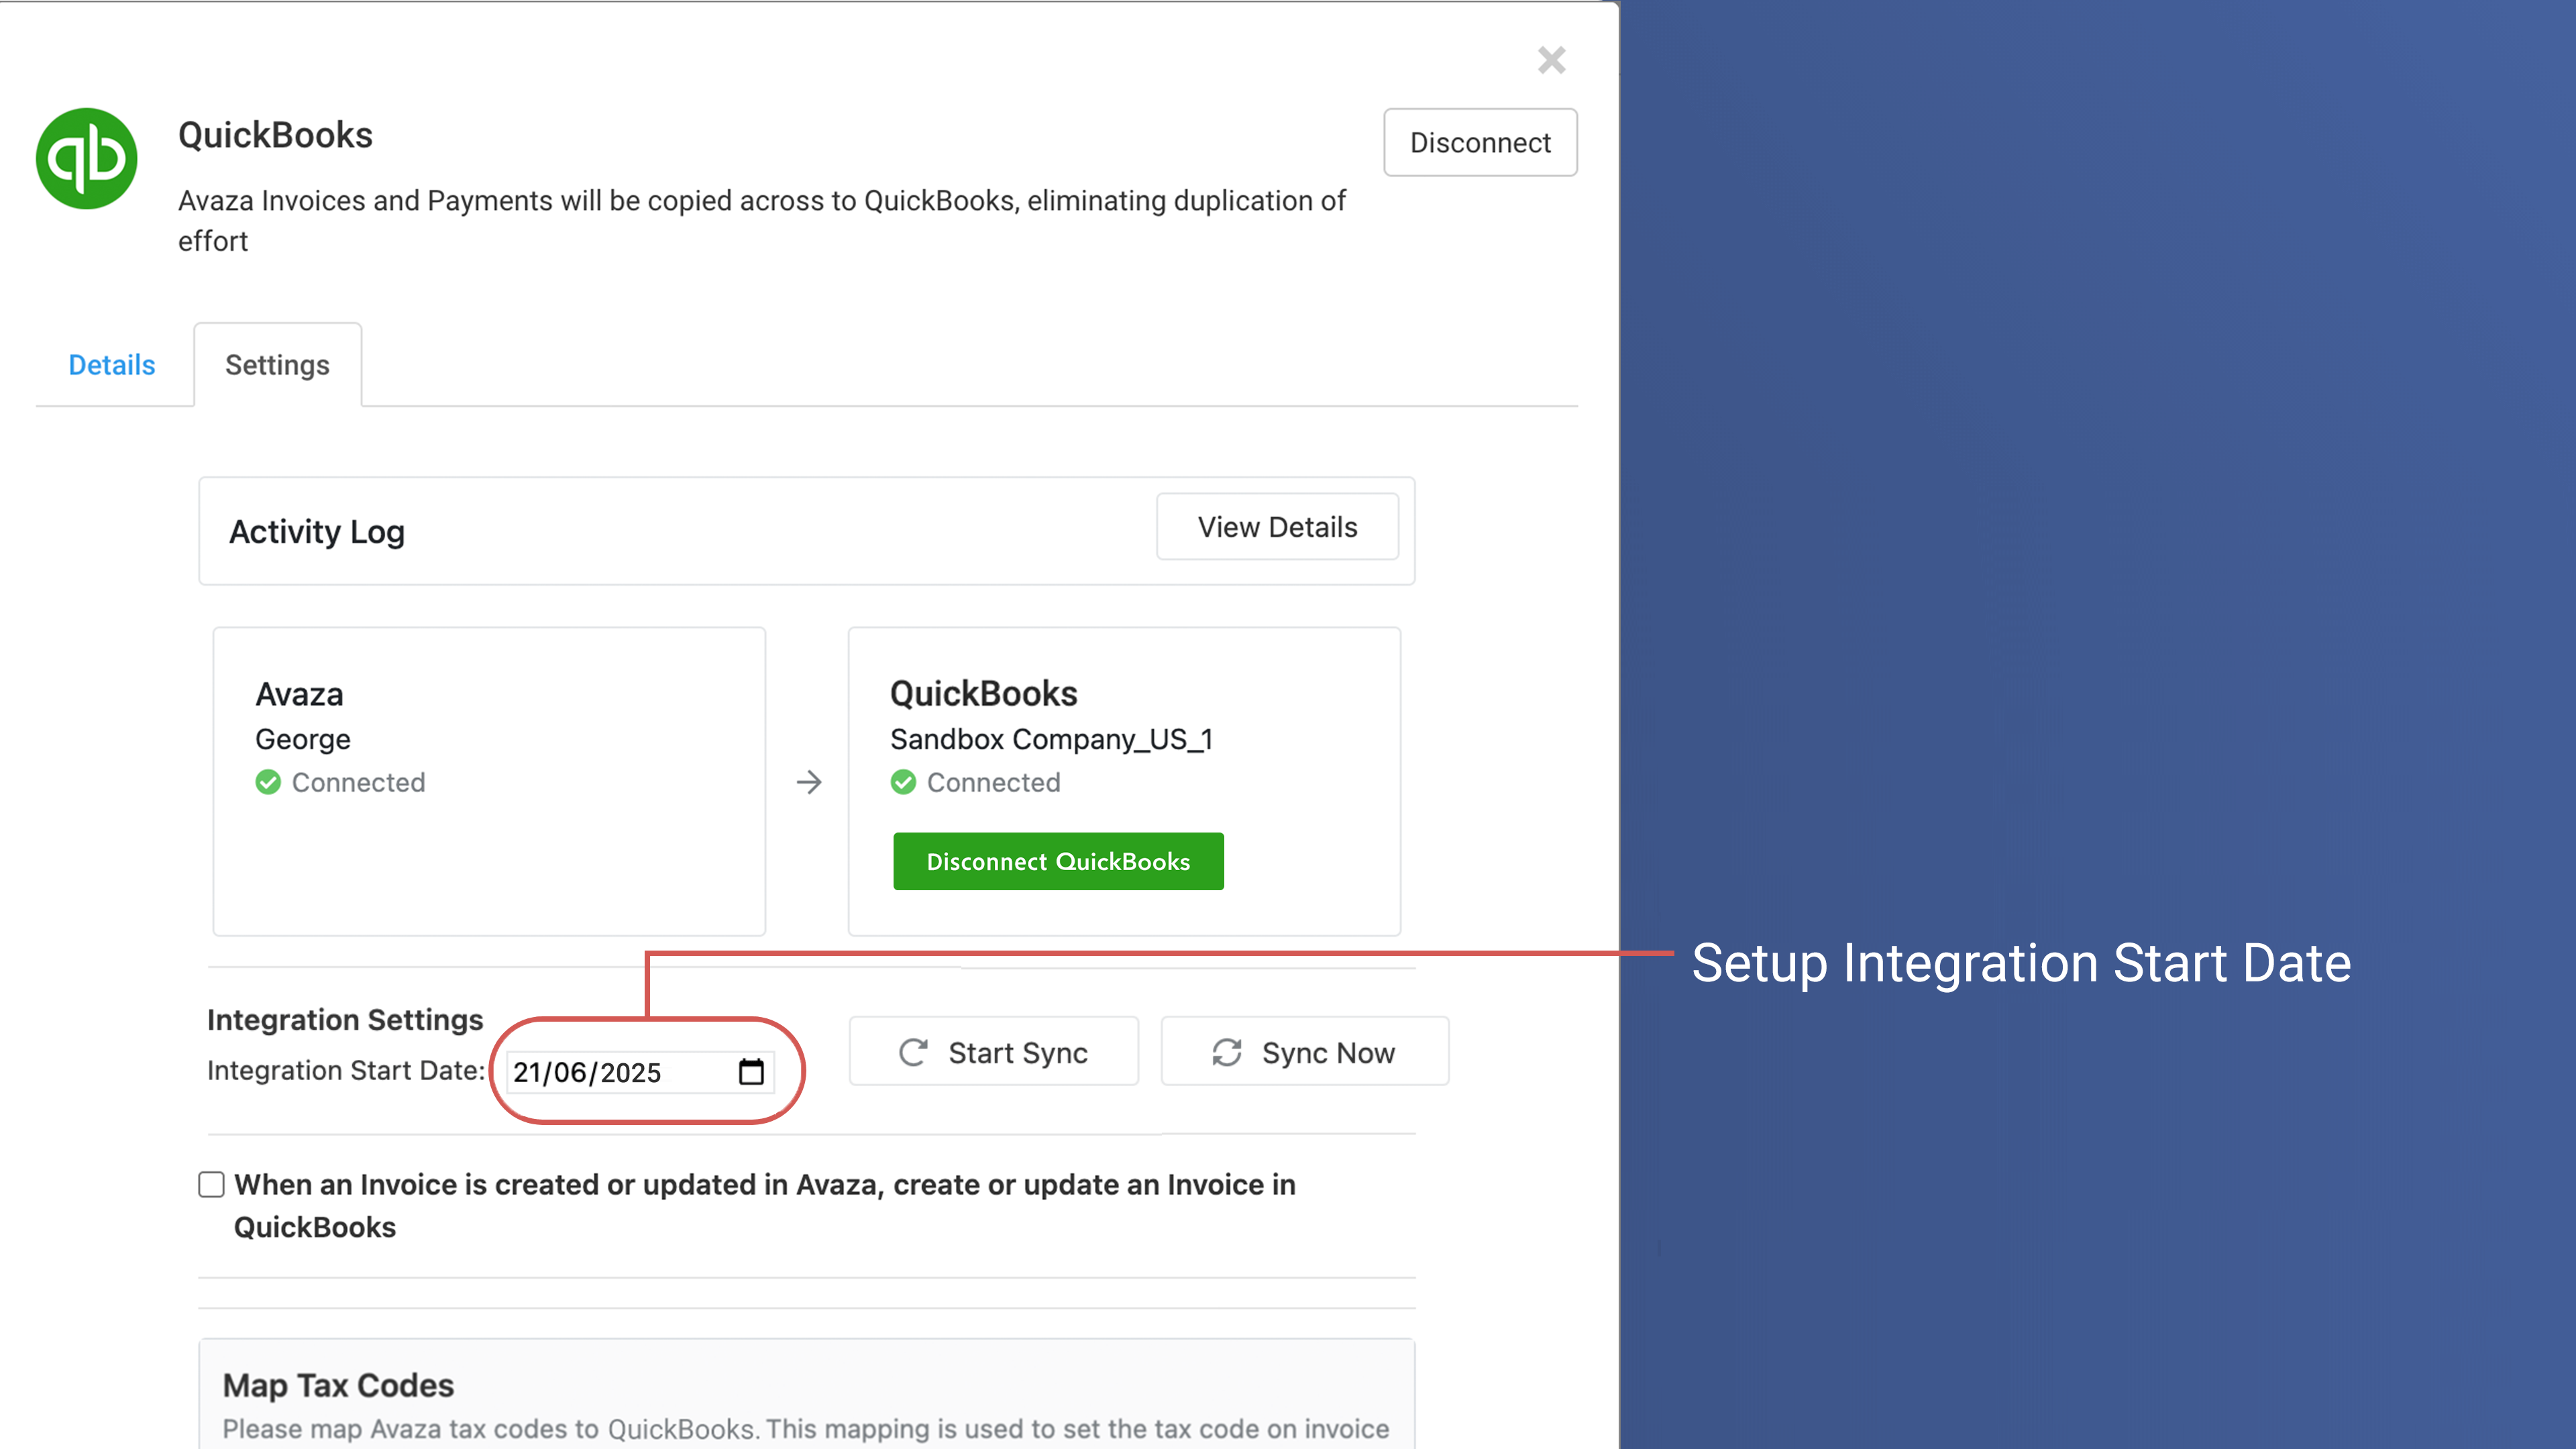
- Under the Integration Settings panel you will see a checkbox “When an Invoice is created or updated in Avaza, create or update an Invoice in QuickBooks”. This is the primary scenario supported by our integration. Please check this checkbox to view its settings.
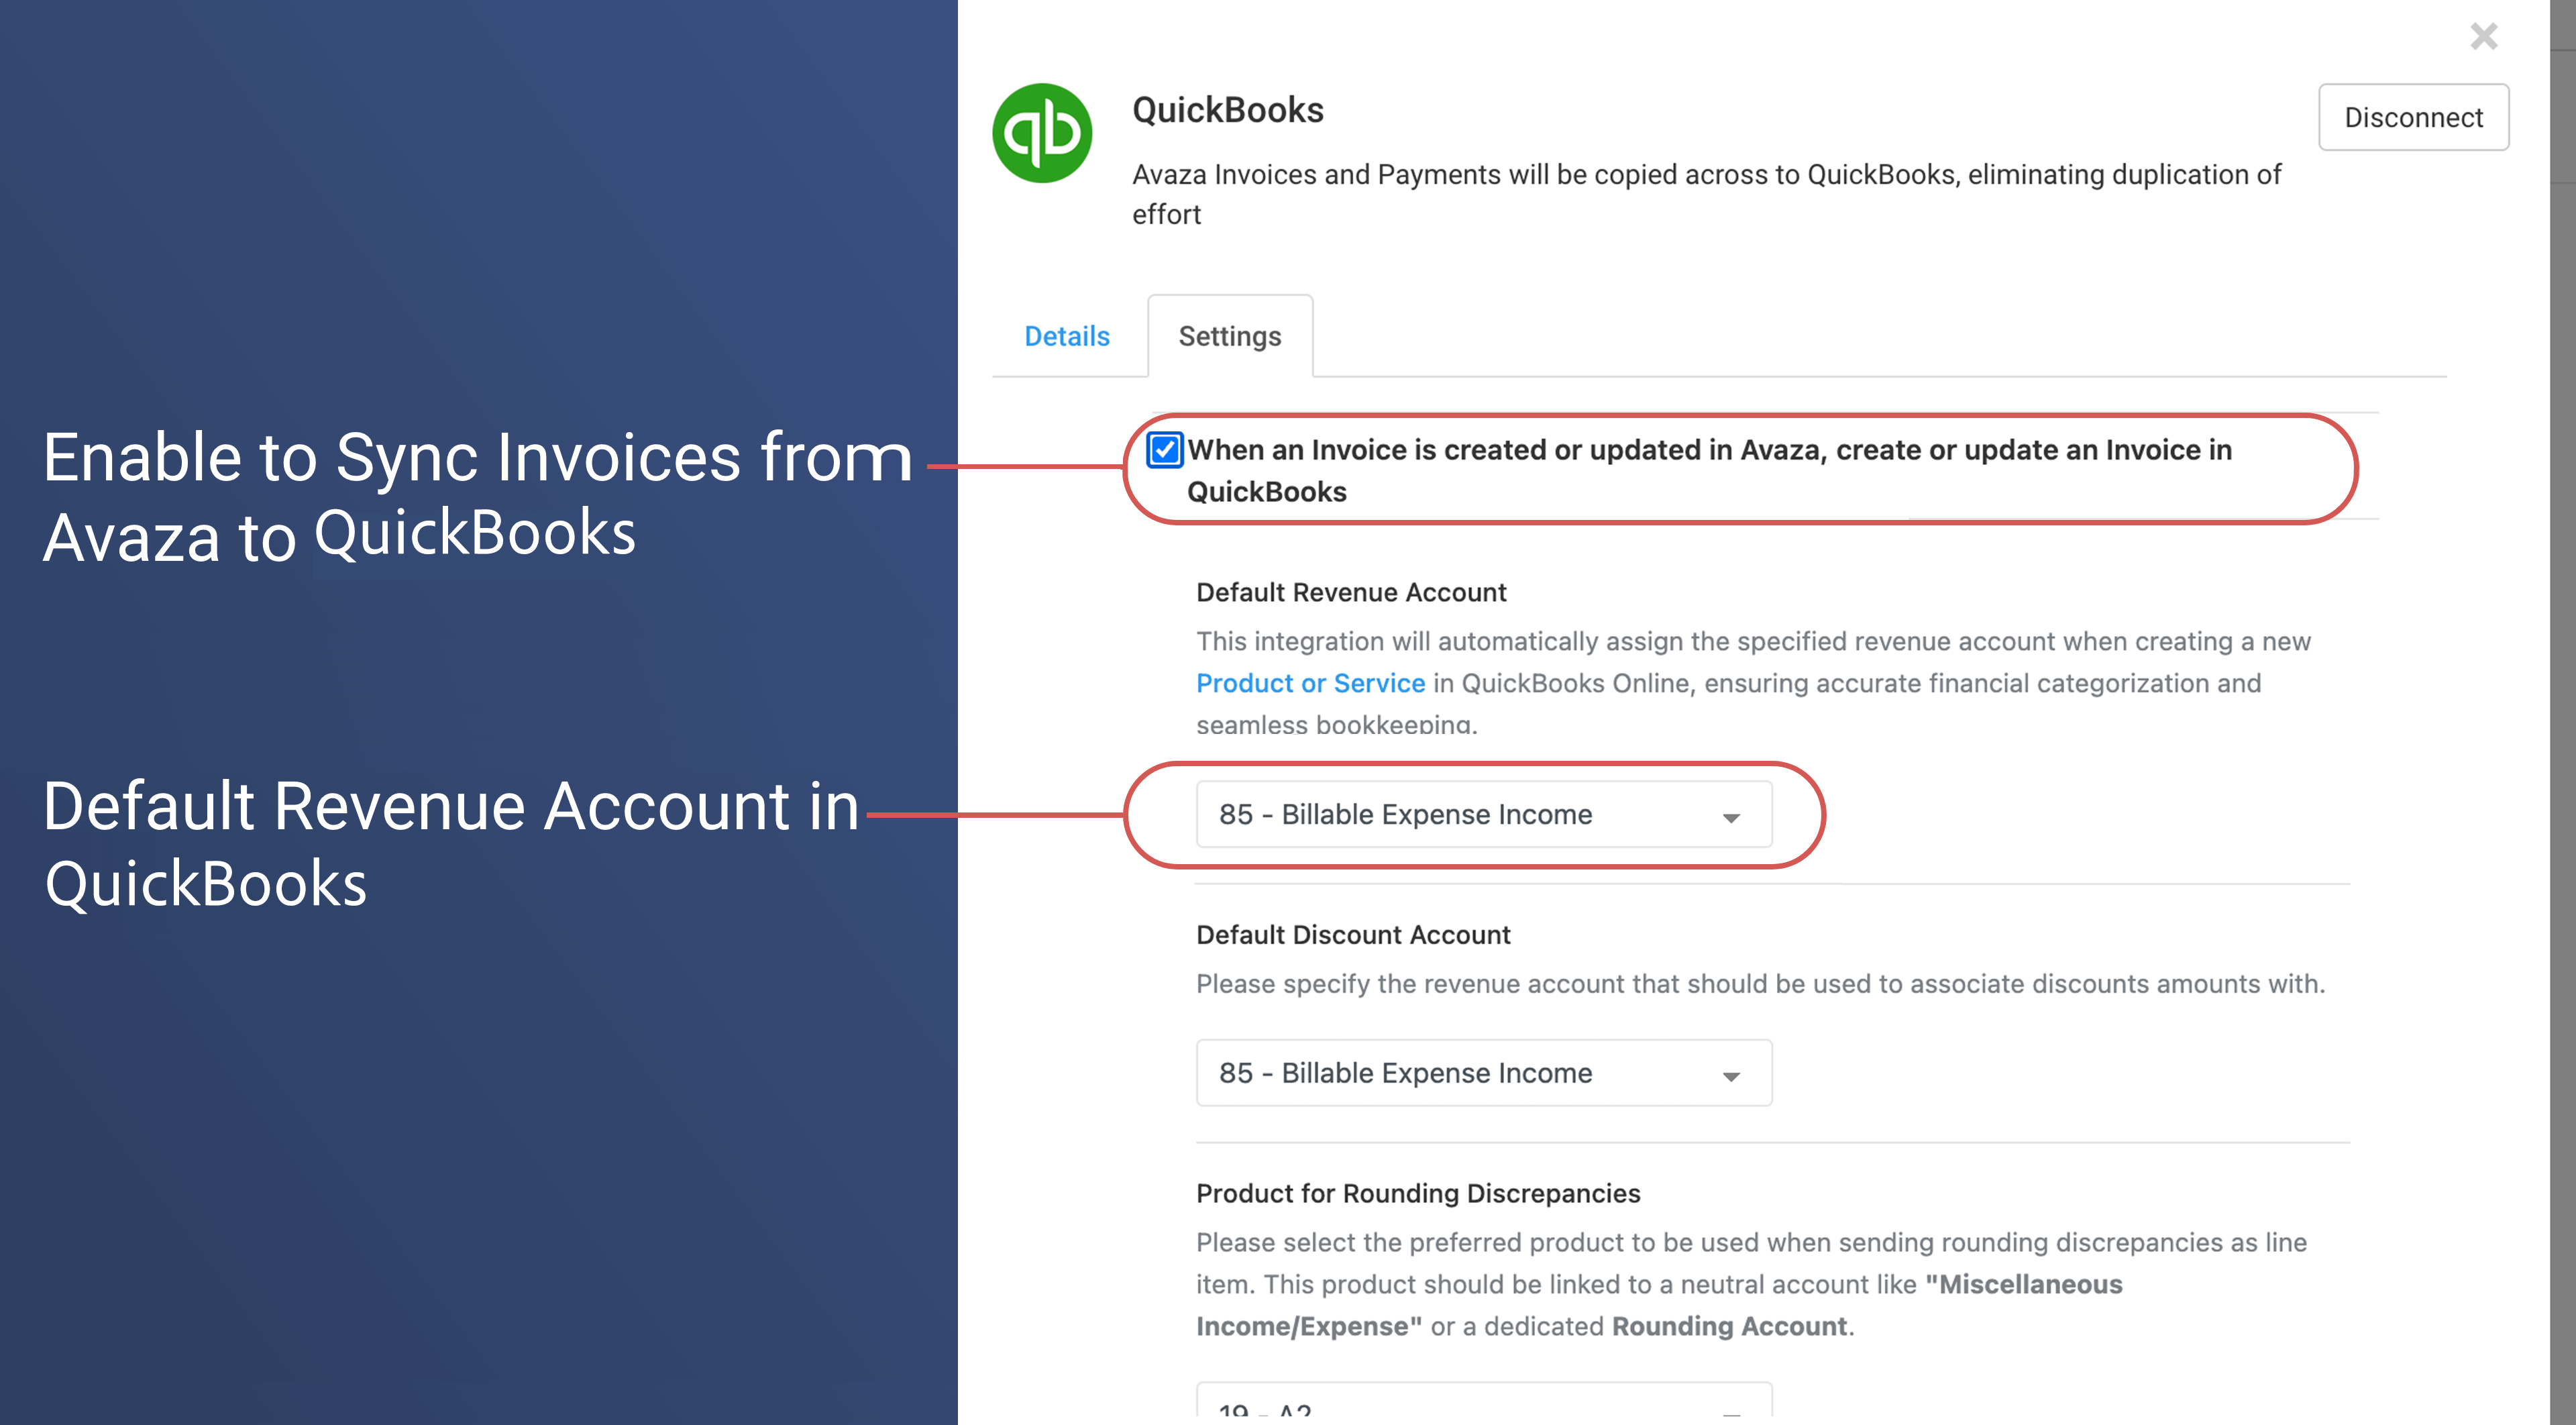
- Select the Default Revenue Account that will be specified as revenue account when creating a new Product or Service in QuickBooks Online, ensuring accurate financial categorization and seamless bookkepping.
- Specify one of the revenue accounts that shold be used for discount amount.
- Certain invoices may generate a minor rounding amount to ensure the invoice total is the same. Please specifiy the Product that the rounding amount should be allocated to.
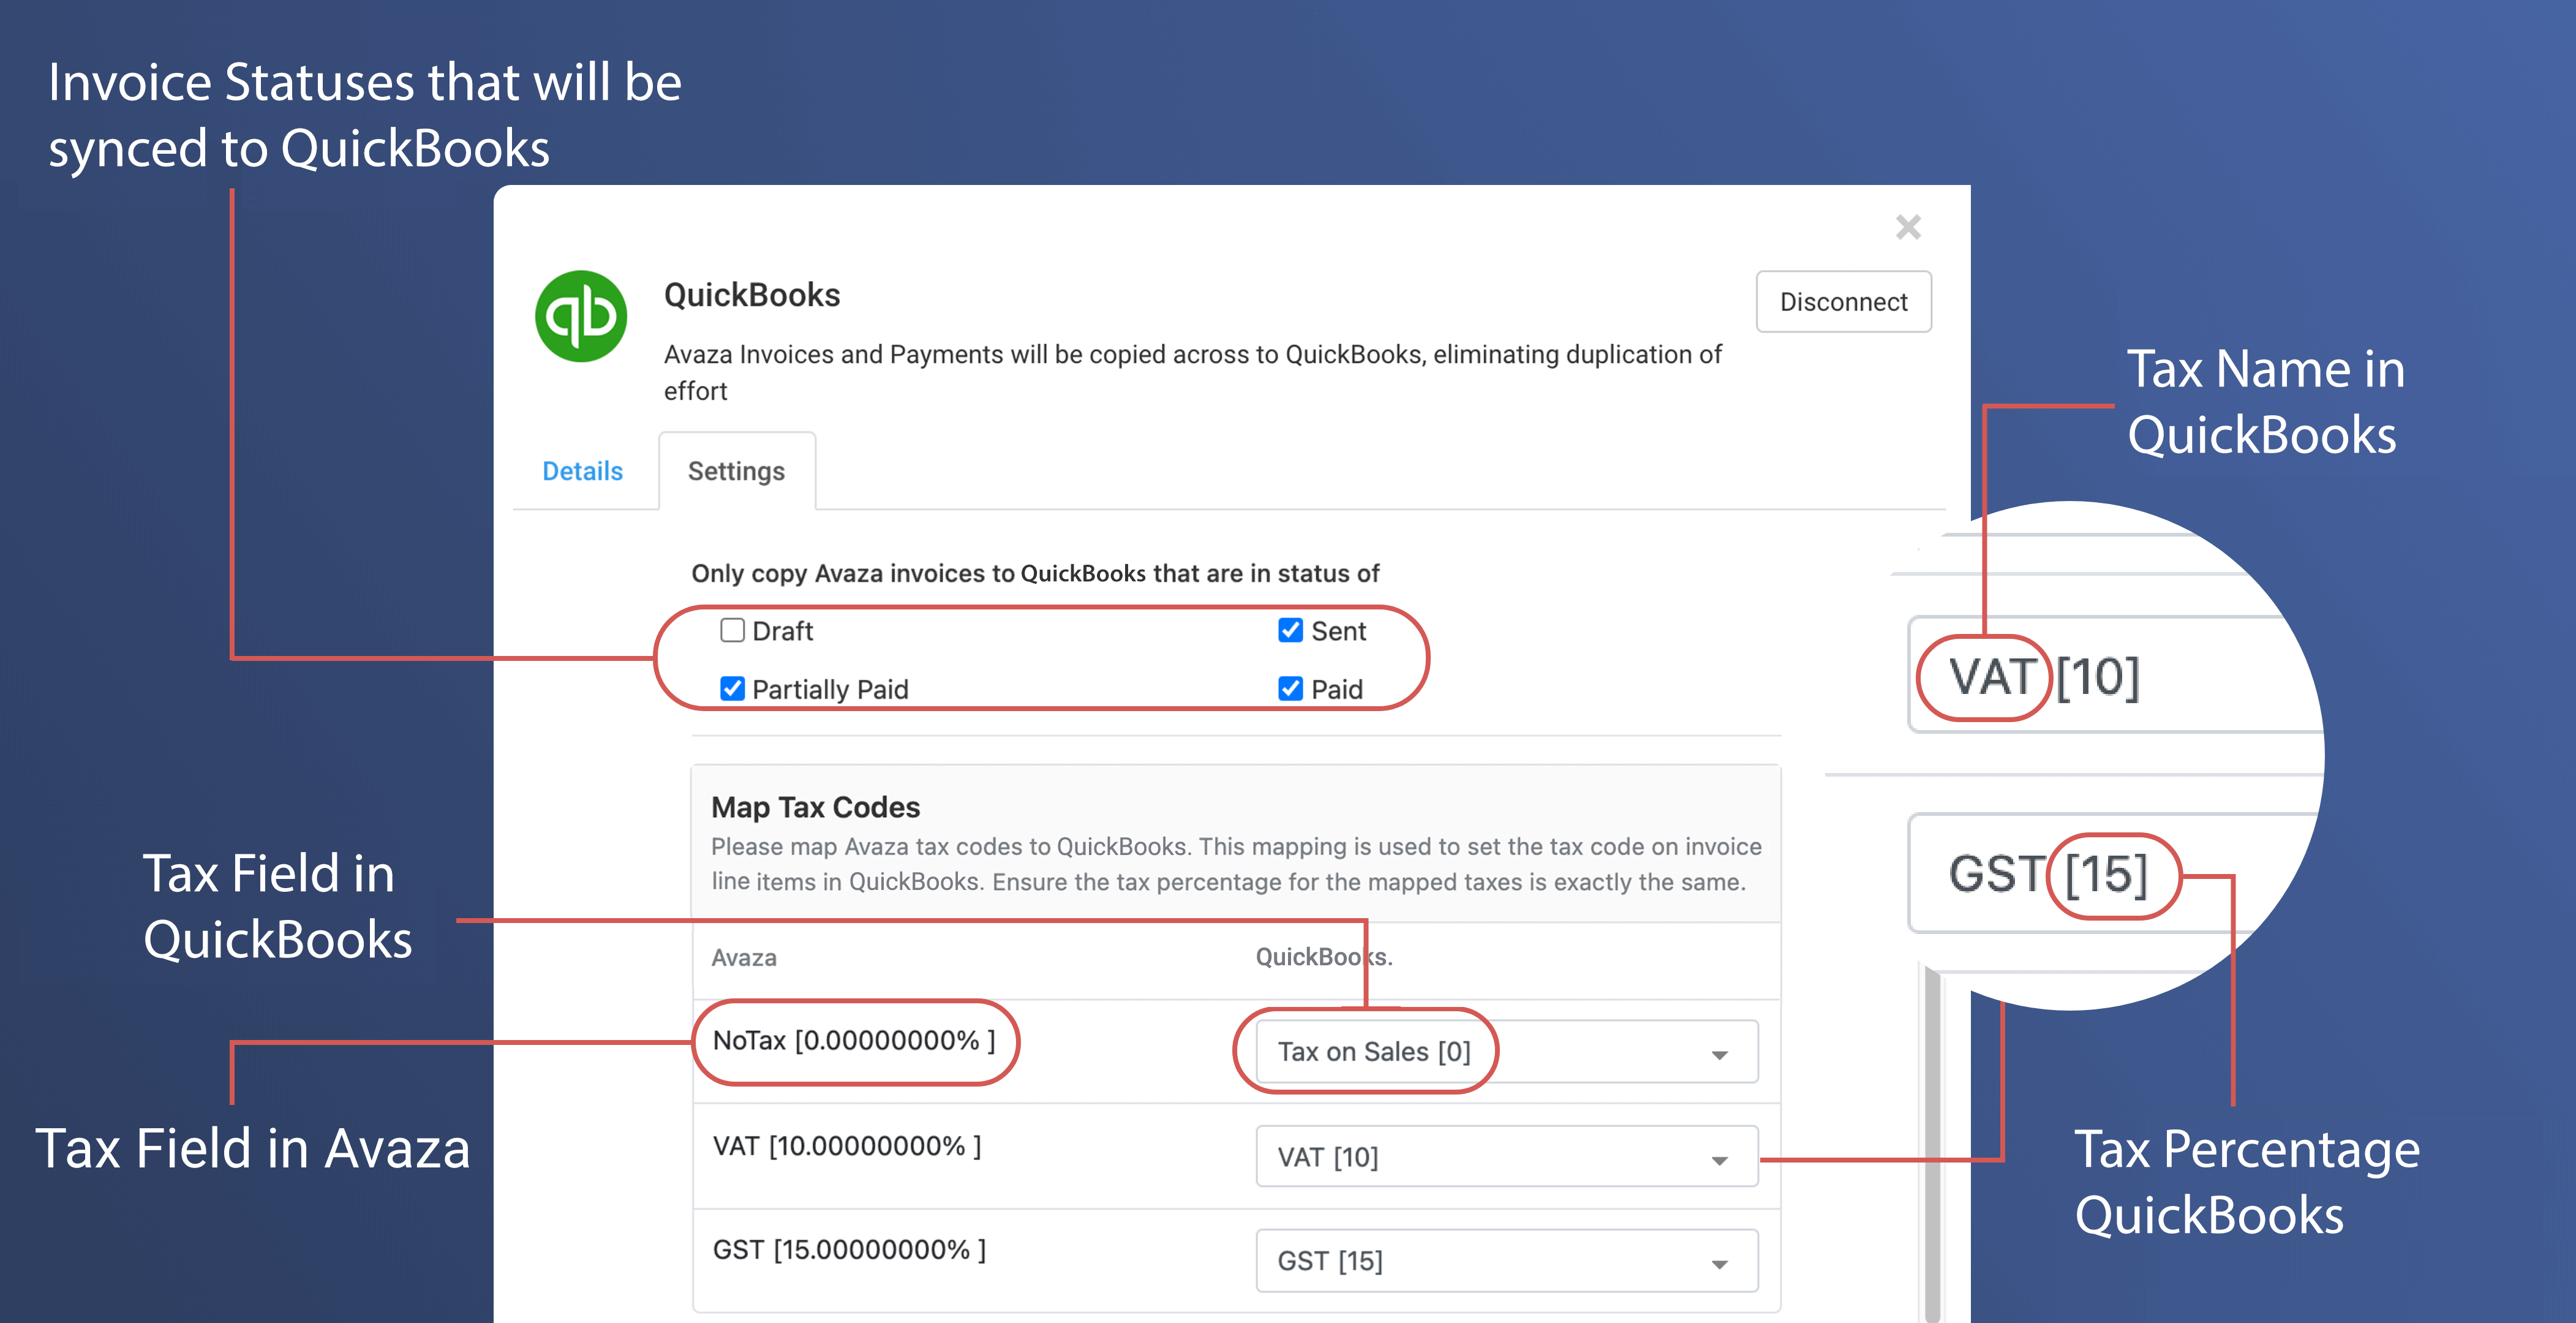
- Choose which Avaza Invoices you wish to pass to Quickbooks by selecting the relevant Invoice statuses
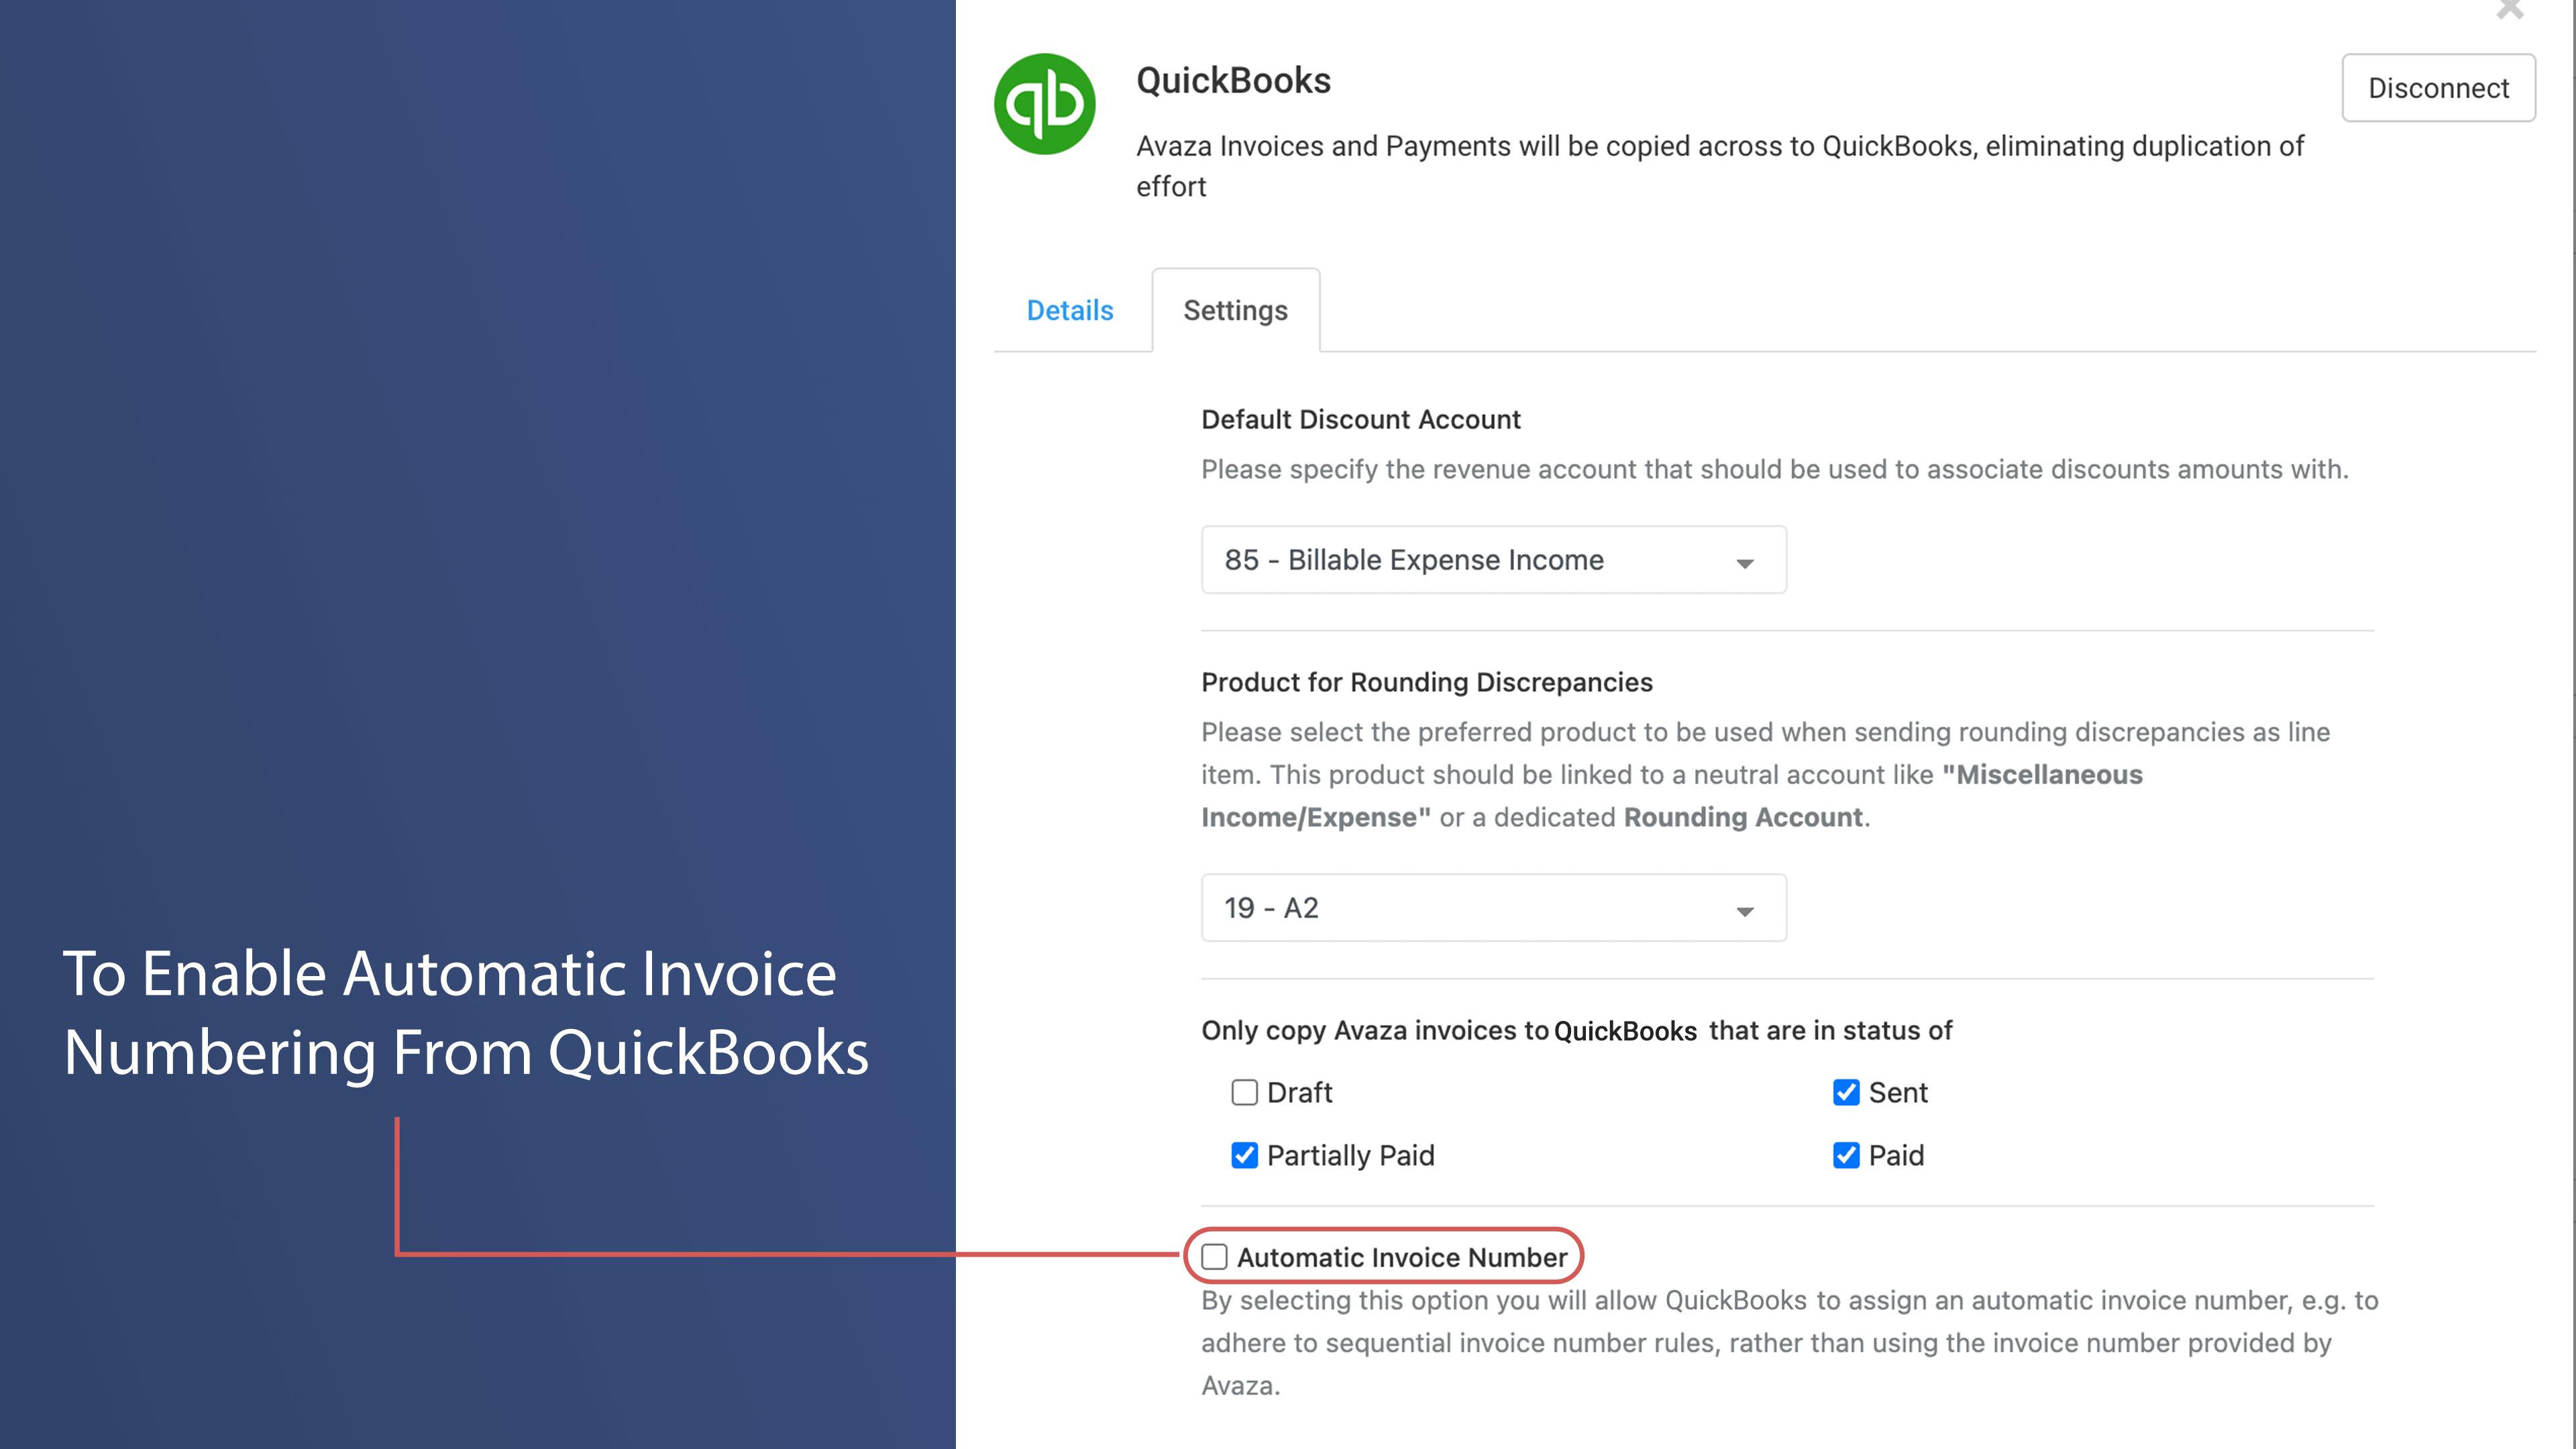
- Check the Automatic Invoice Number option if you would like Quickbooks to generate its own invoice number.
- You will need to map tax codes in Avaza to tax codes in Quickbooks using the drop-downs. All available taxes in your Quickbooks account will be displayed and you will easily be able to choose the correct ones.
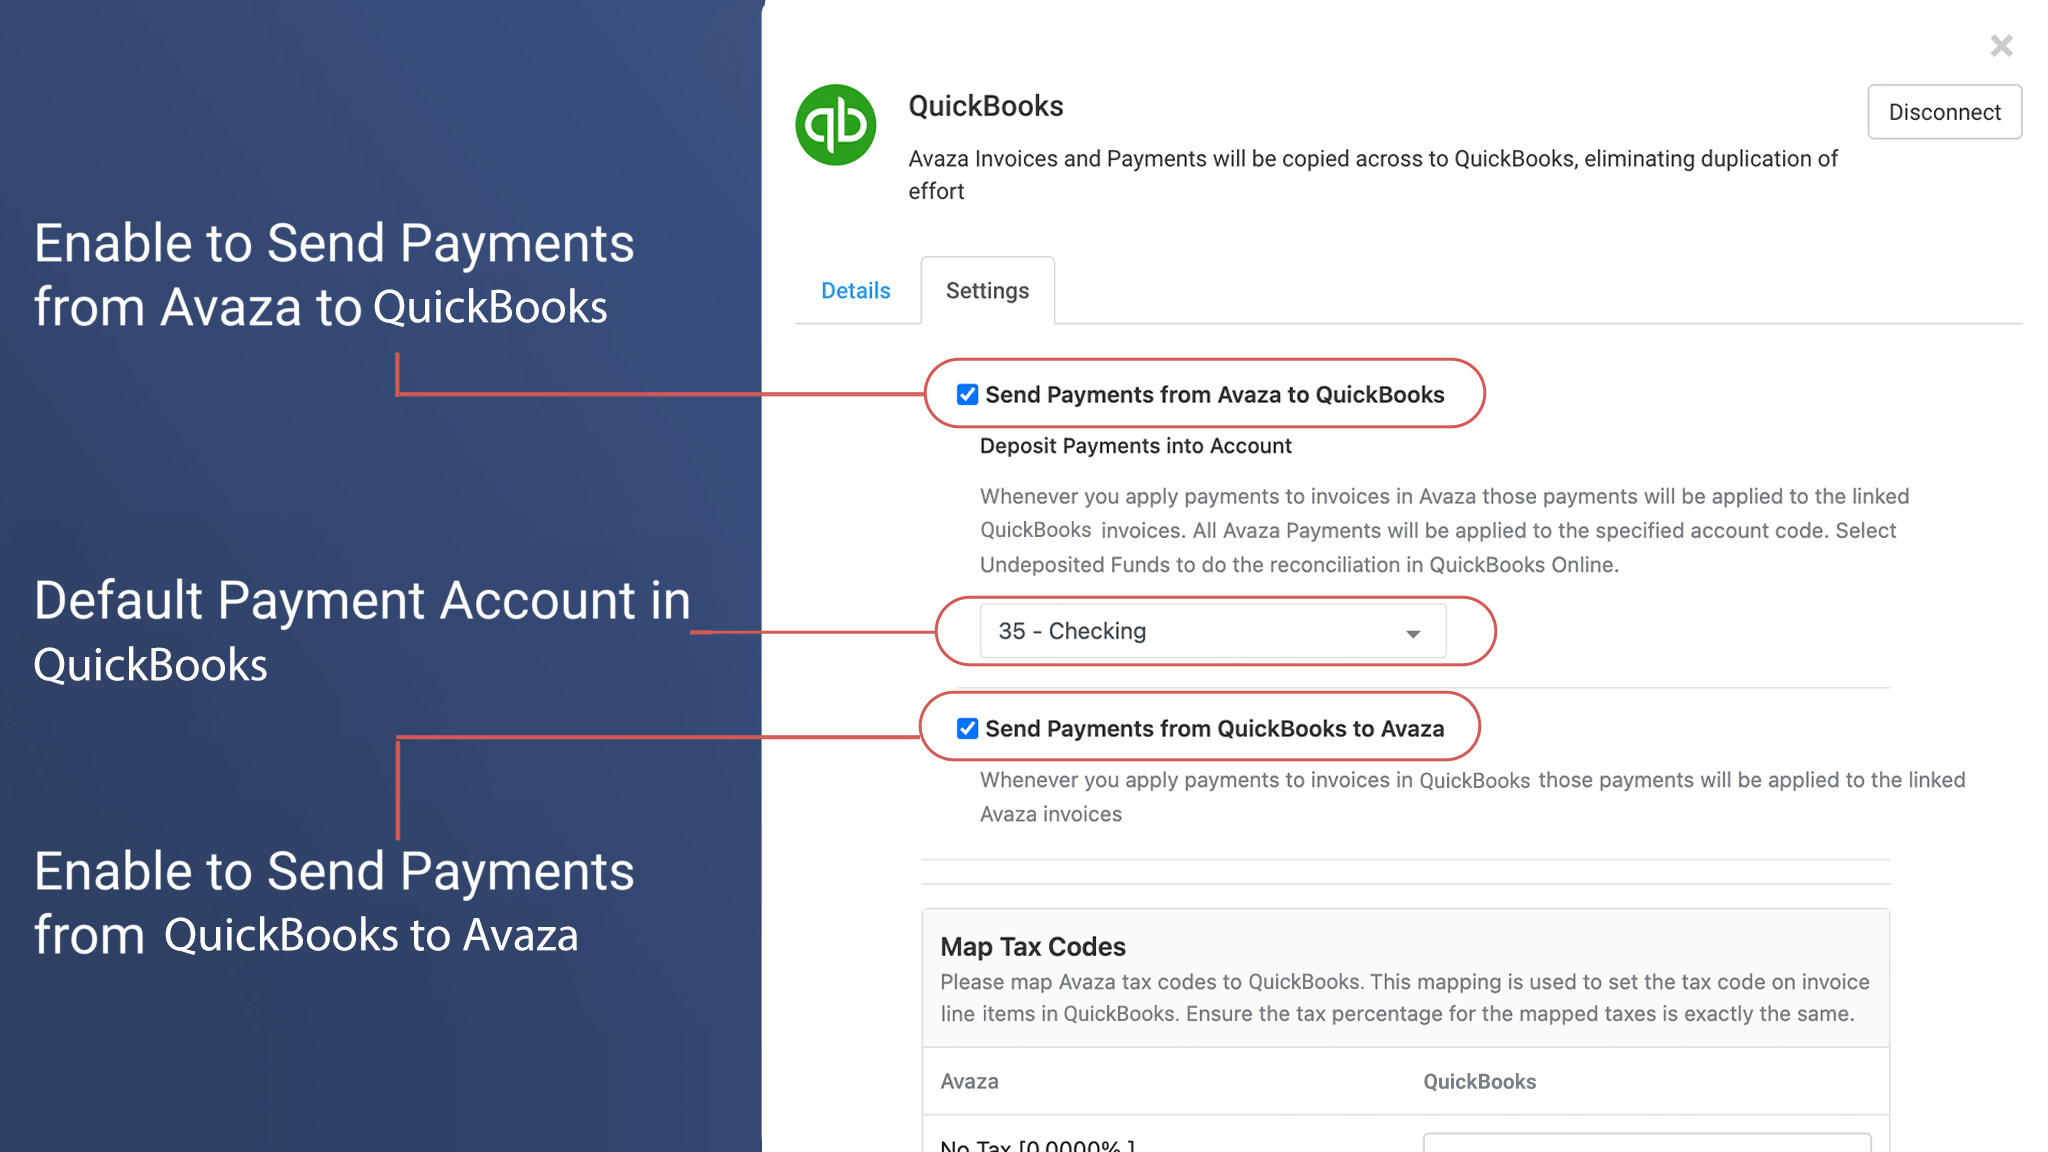
- if you wish to send payments that are applied to invoices in Avaza to Quickbooks then check the “Send Payments from Avaza to Quickbooks” option. Whenever you apply a payment to an invoice in Avaza that payment will be applied to the linked invoice in Quickbooks. Please select from the list of payment accounts that will be set when creating a payment in Quickbooks.
- If you prefer creating and applying payments in Quickbooks instead then check the “Send Payments from Quickbooks to Avaza” option. Whenever you apply payments to invoices in Quickbooks those payments will be created in Avaza automatically.
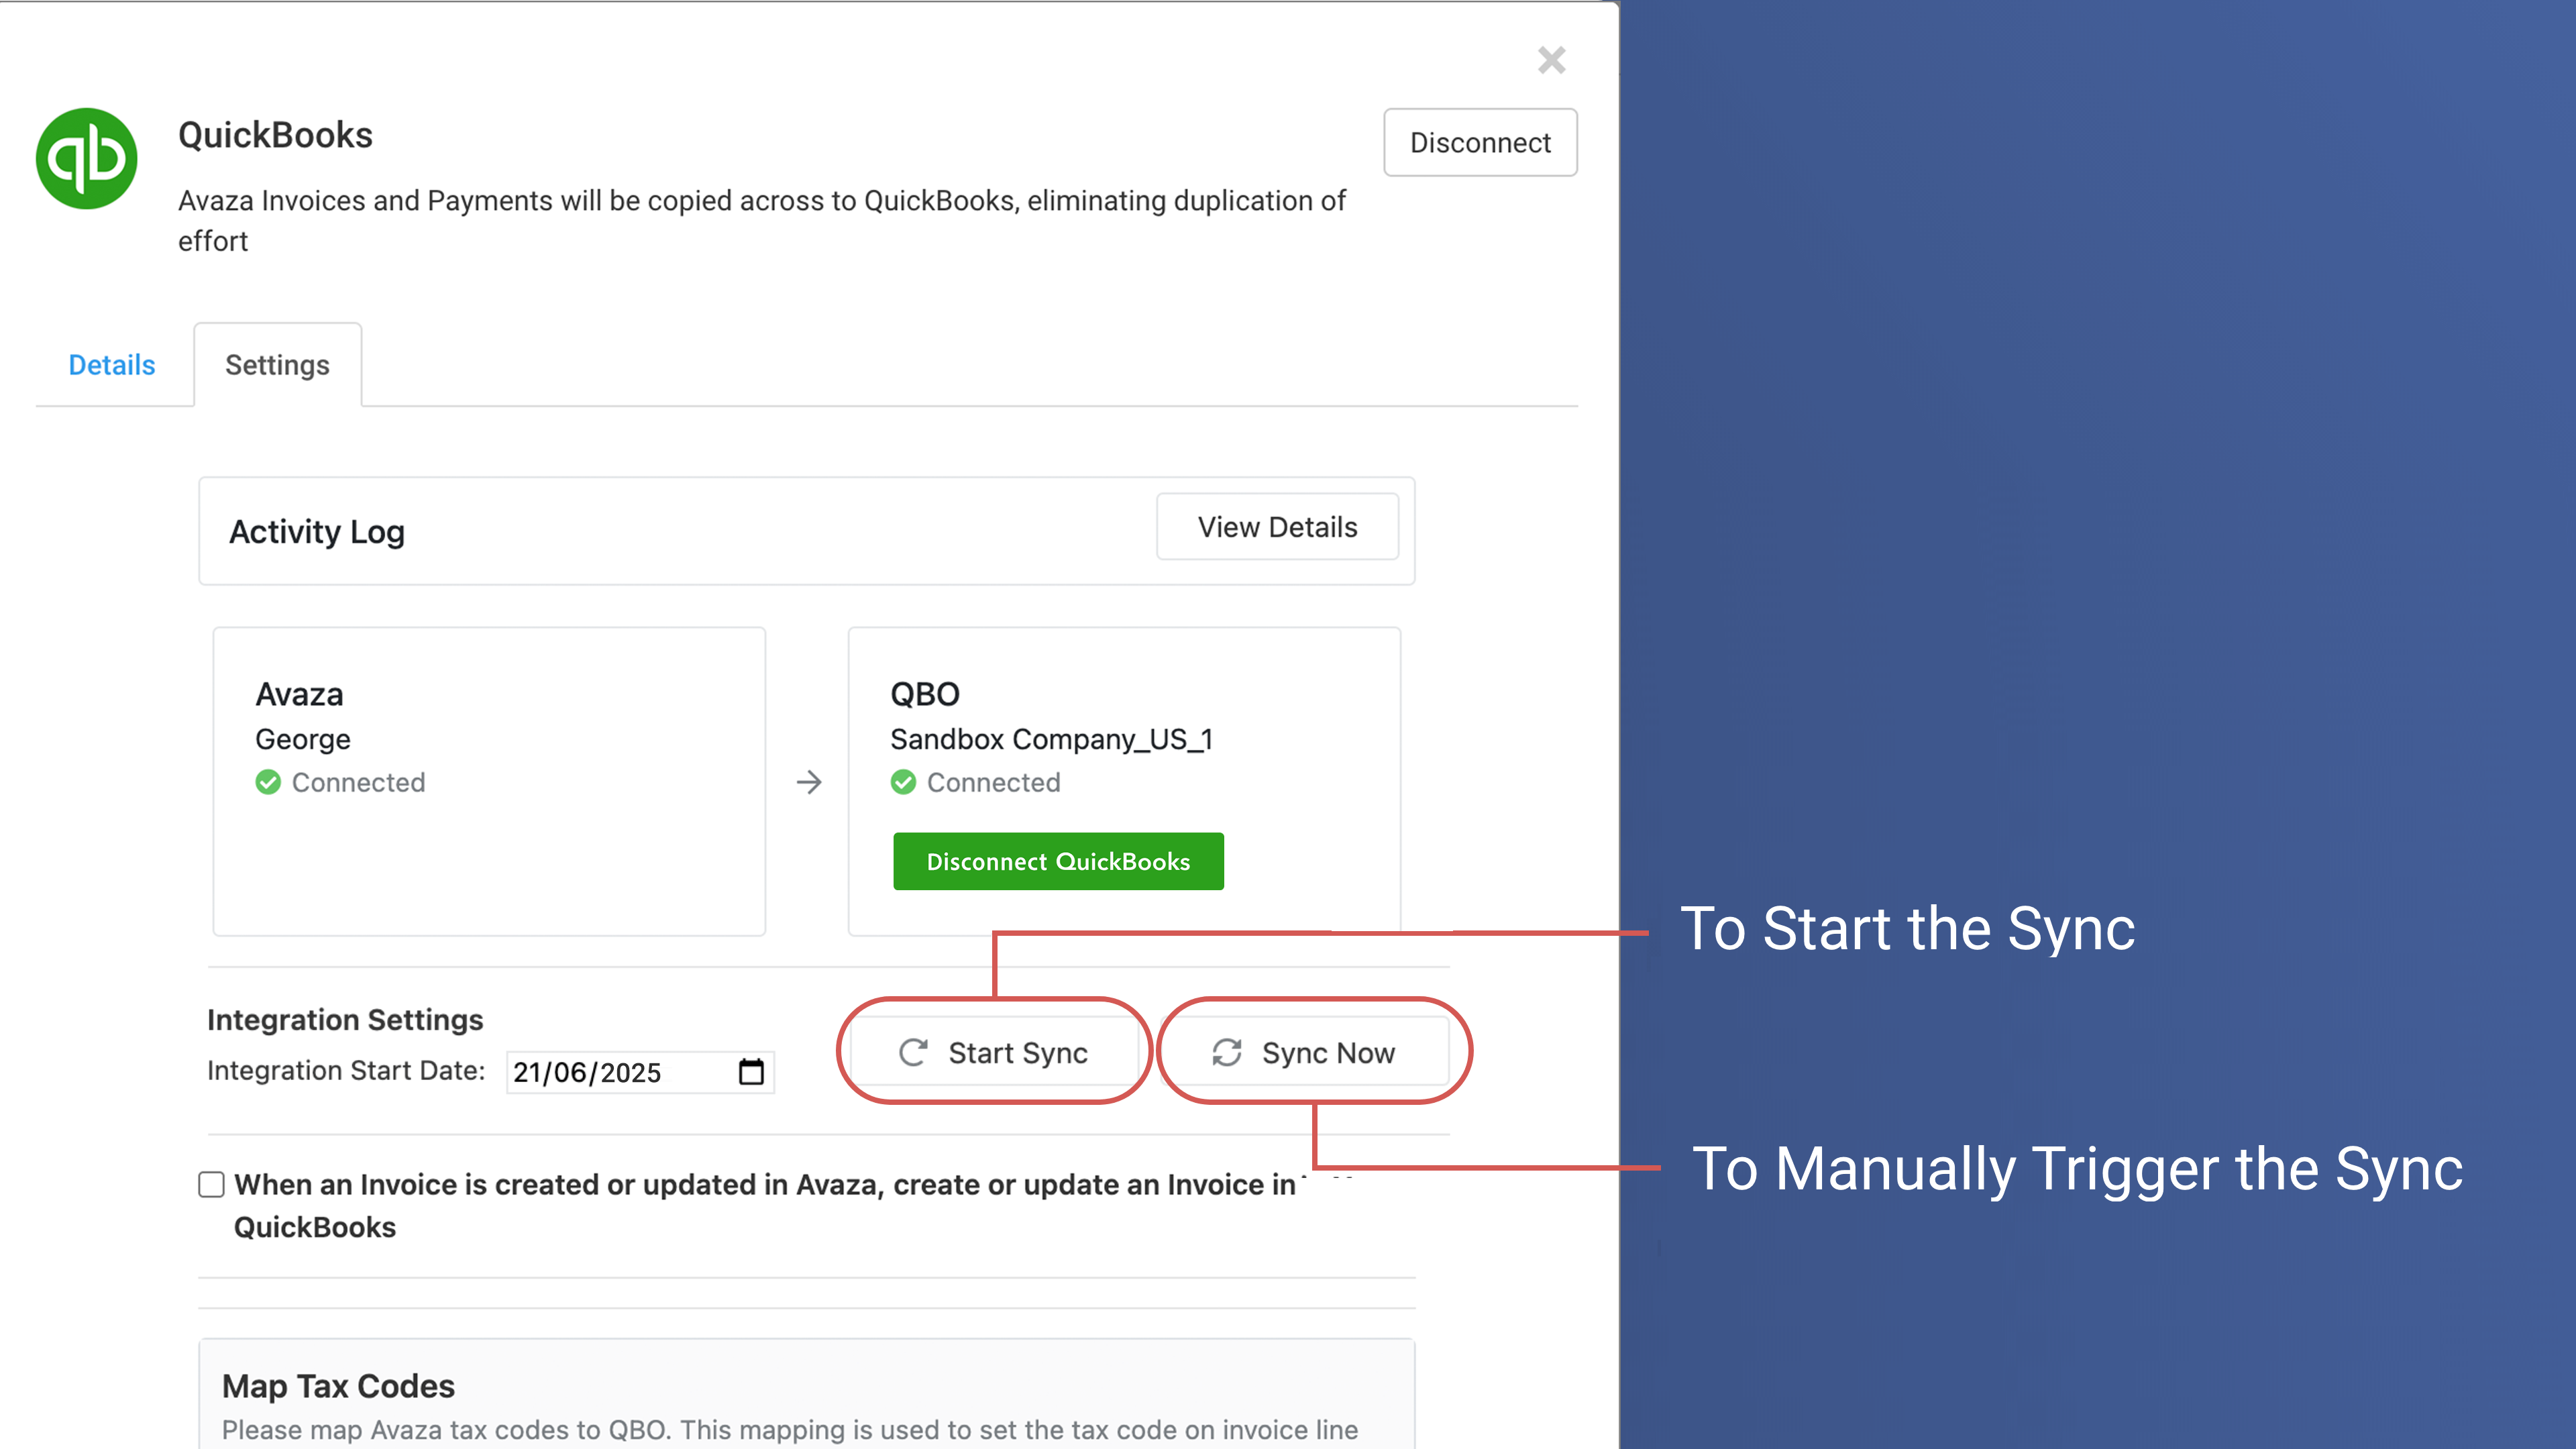
- Once you have configured all the settings click the Save Settings button. You can now click the Start Sync button. The integration is now active and whenever a new invoice is created or updated in Avaza it will copy that information to QuickBooks instantly. You can also click the Sync Now button if you wish to run the sync immediately without creating or updating invoices in Avaza.
Exception Management
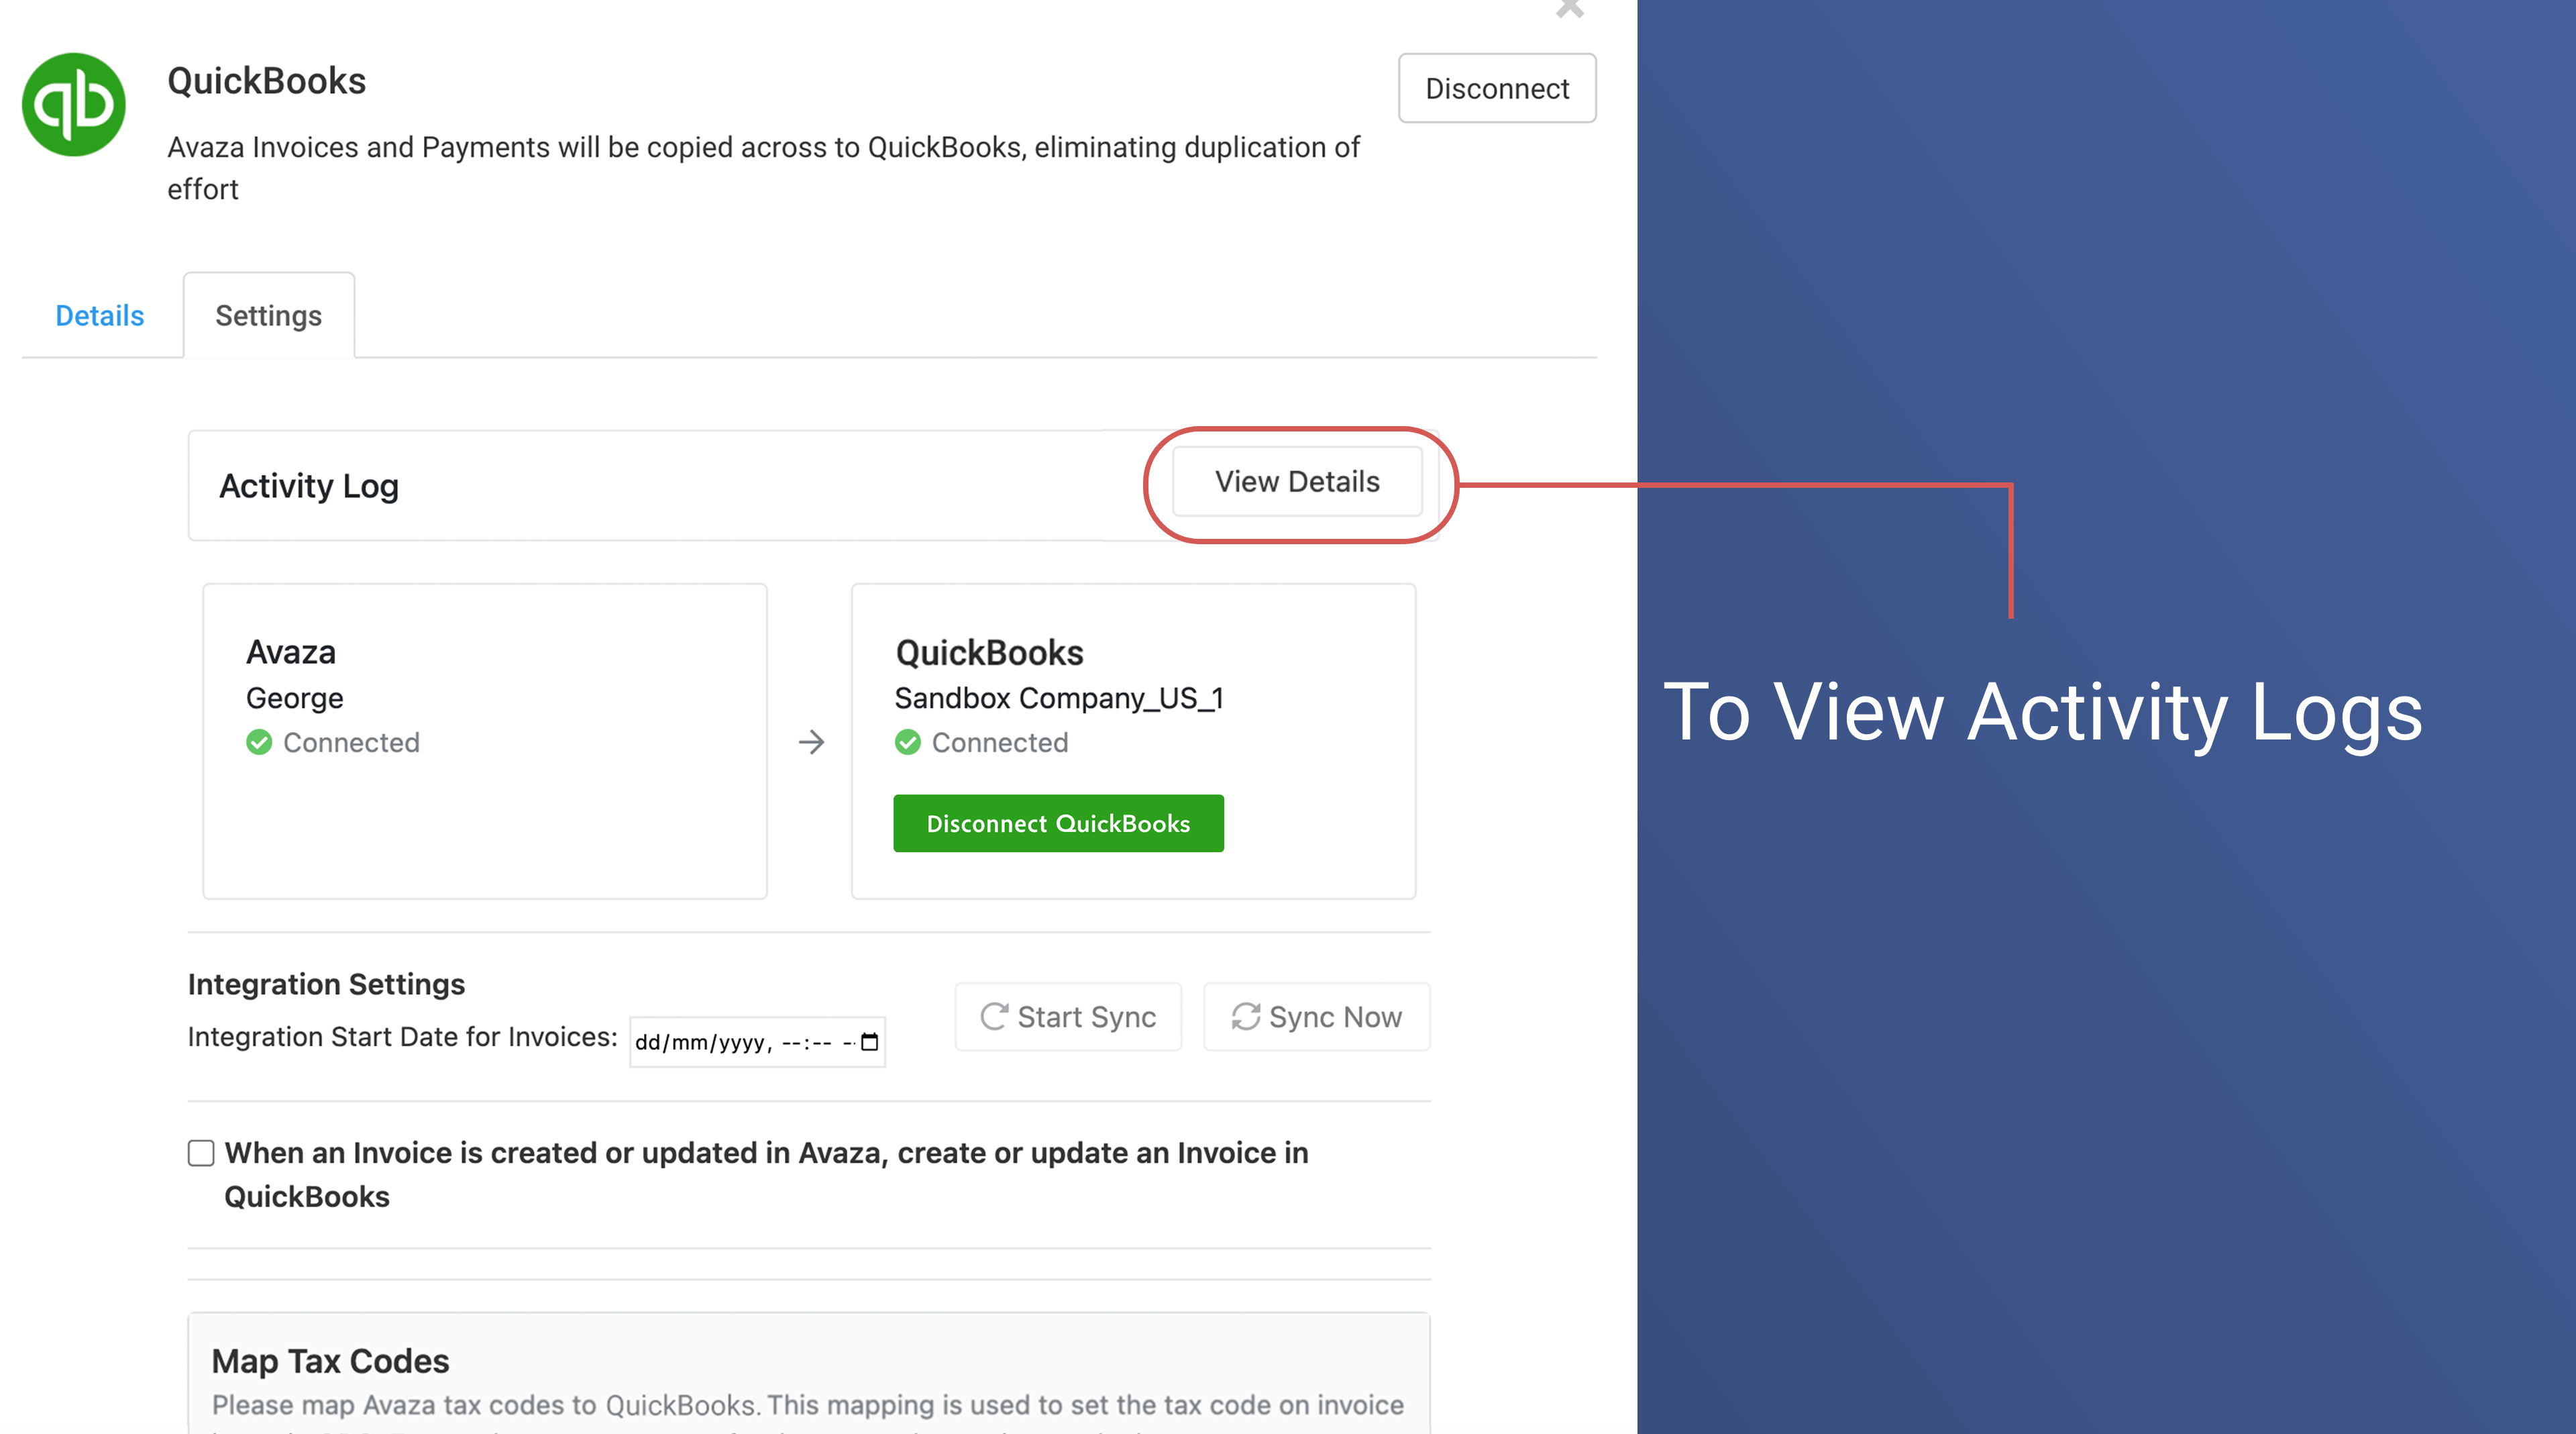
If the integration is unable to update Quickbooks or Avaza for some reason then the exception will be logged in the Activity Log section. In addition to this, an exception email will be sent as well.
In order to access the Activity Log, click the “View Details” button from the Activity Log panel placed at the top of the Settings page.
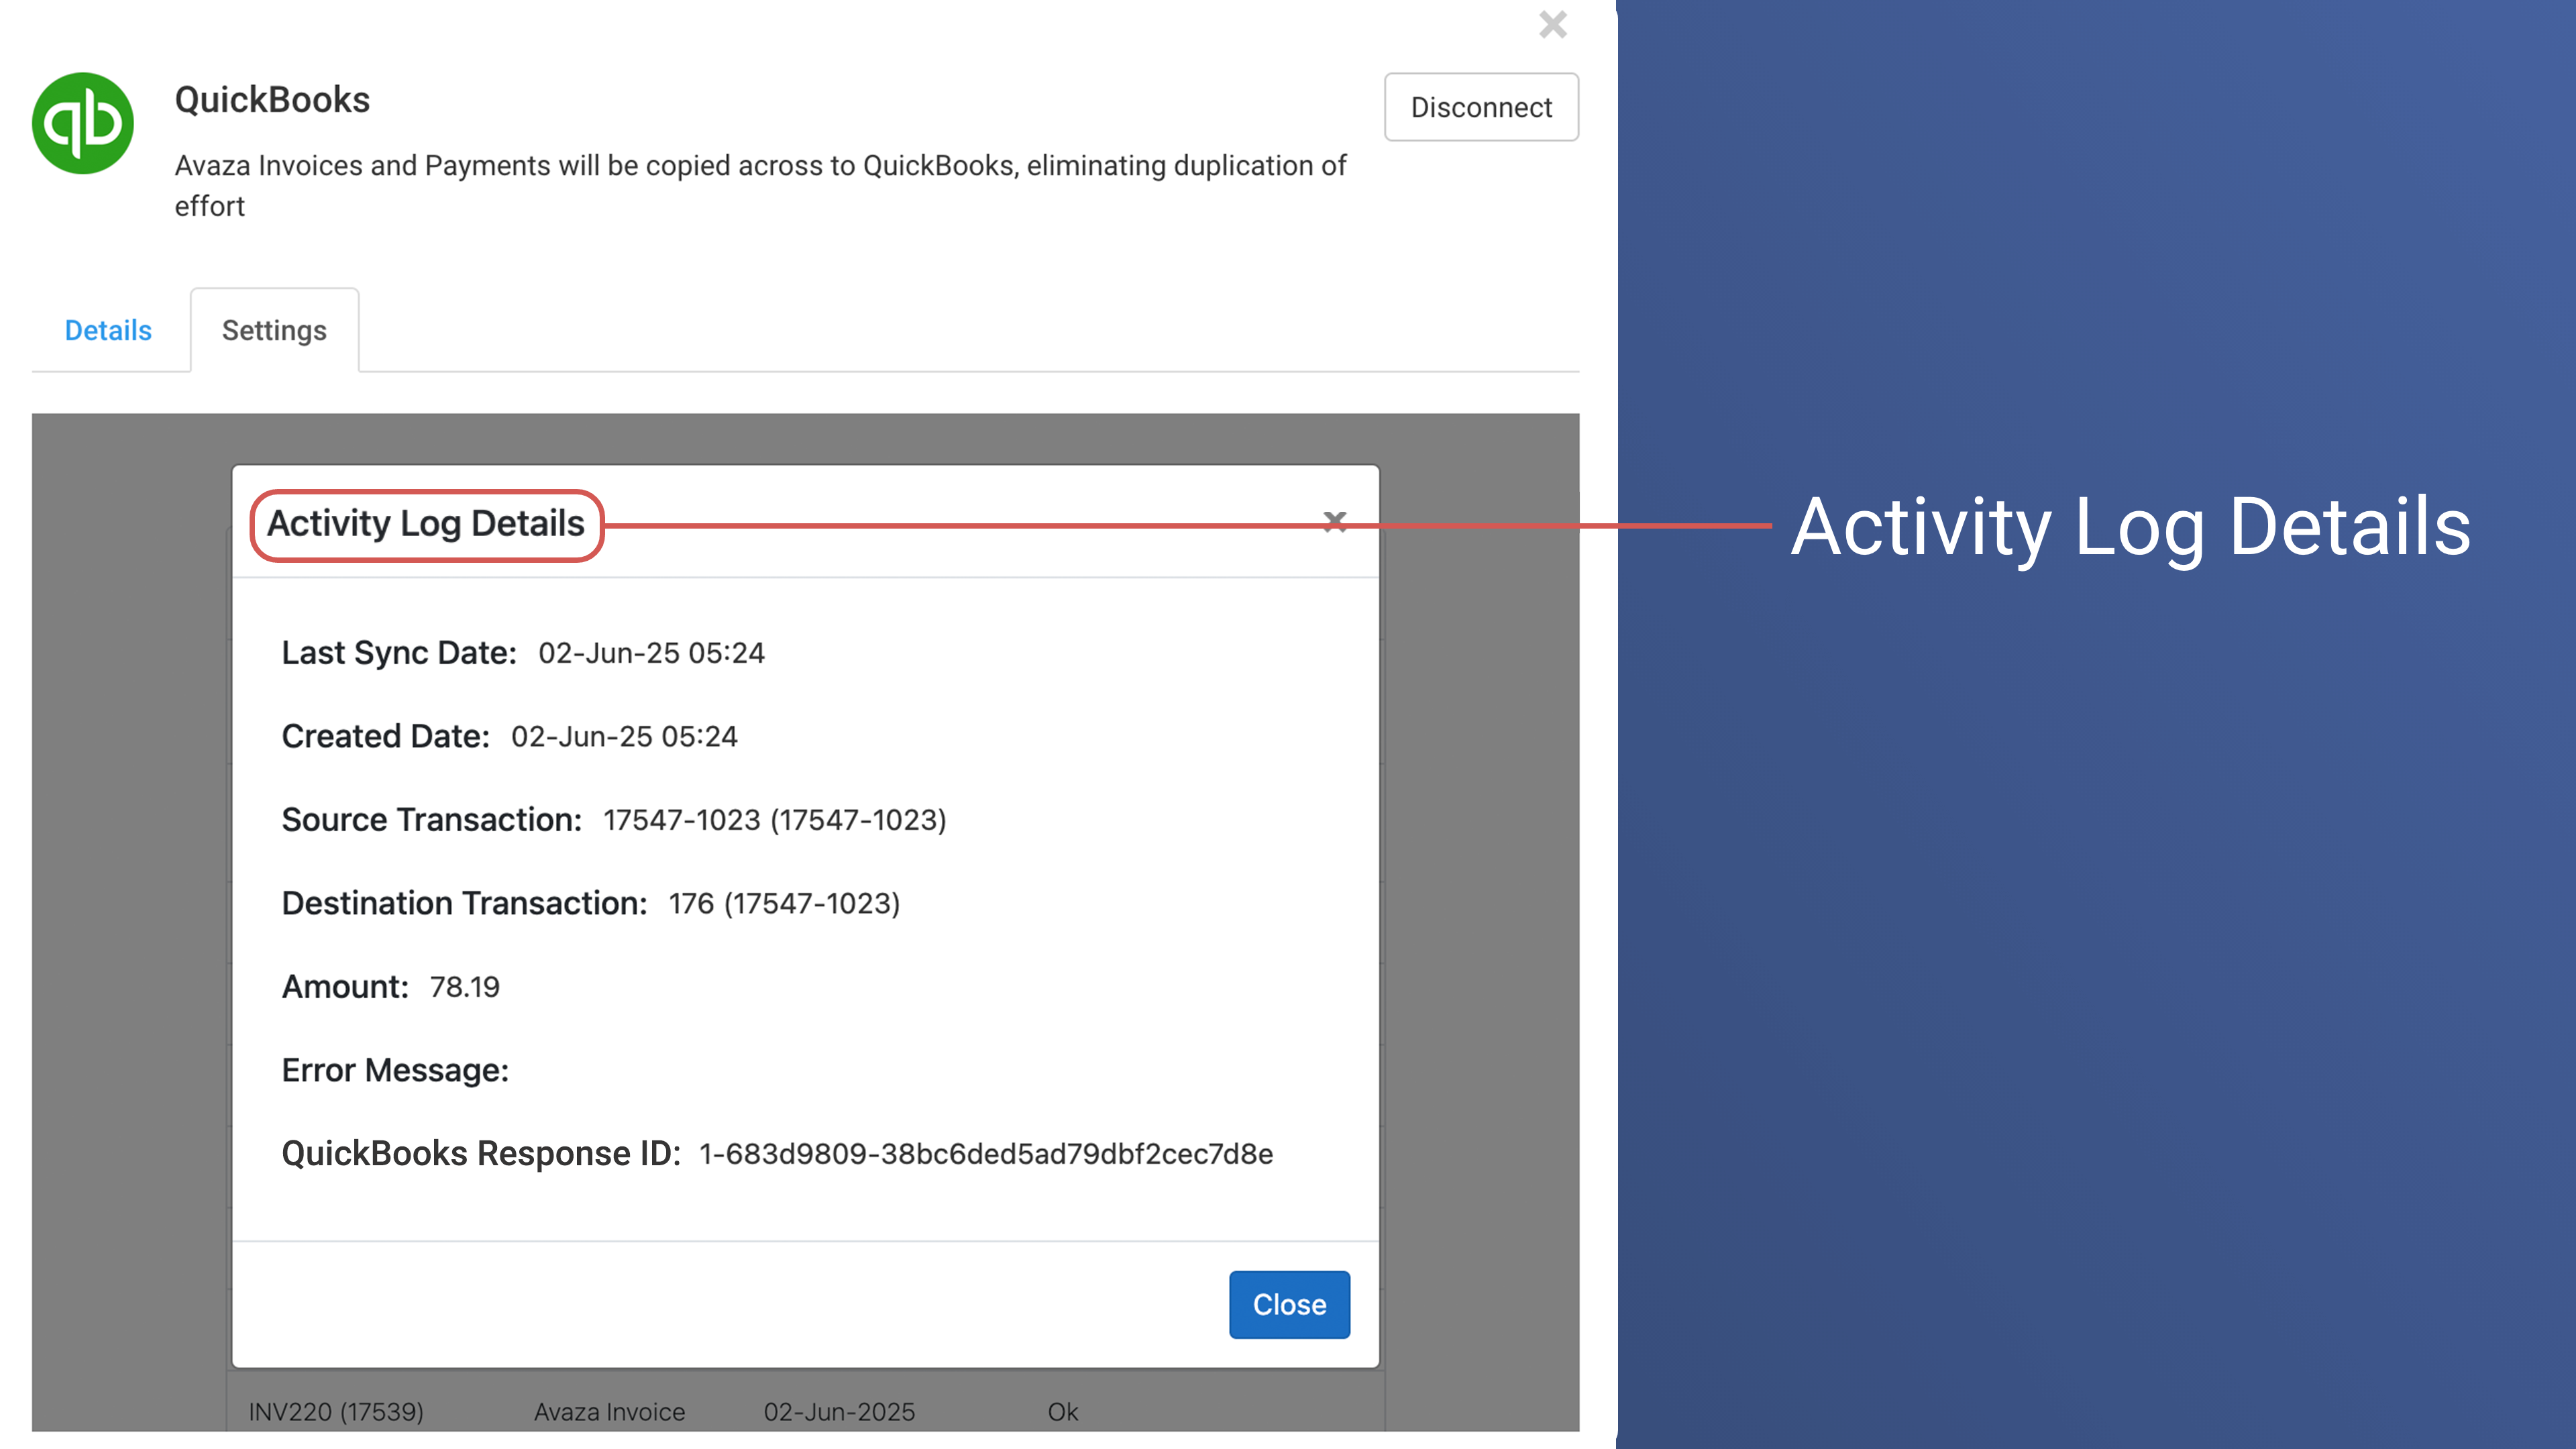
The Activity Log list displays all transactions that the sync function has attempted to process. All transactions that have synced without any issues will display the status of “Ok”. The transactions that the sync function was unable to process due to some issue will be in the status of “Error”.
You will notice an “Ignore” button next to the error transactions. If you don’t want the integration to try syncing it again then click the “Ignore” button. You will notice an “Undo” button next to transactions that are already ignored. Clicking “Undo” will retry syncing that transaction. Please note that the integration automatically ignores any transaction that has failed 5 times. Use the filter dropdown to only view transactions that are in Error status.

In order to view the details of a particular activity log record simply click the record. It will display important details such as the error message and more.
The exception email includes the following details.
- Where possible the email will include Avaza Invoice Number with a link to open the invoice in Avaza.
- Detailed error message received from Quickbooks or Avaza API
- Quickbooks Account Name that integration is connected to.
This email will be sent to the user who last updated the integration settings page and to the account email. You can update the account email by navigating to Settings > General Settings page.

Frequently Asked Questions
Who in our Avaza account can access the integration?
QuickBooks integration can only be accessed by Avaza users with the Administrator role assigned.
How do I pause the integration?
You can Pause the integration at any point you wish. Simply navigate to Settings > Marketplace Apps > QuickBooks and on the Settings page under the Integration Settings panel click “Pause Sync”. Data is not automatically copied between Avaza & Quickbooks when the sync is in Pause status.
How do I disconnect from QuickBooks?
On the Integration Settings page, you will notice the Disconnect from QuickBooks button inside the Quickbooks connection panel. A confirmation popup will be displayed informing you that disconnecting Quickbooks will remove all the integration settings and data related to this account. If you click “Yes” then your QuickBooks account will be disconnected and all related data will be deleted.
When does the sync occur?
For active integration, the data is copied between QuickBooks and Avaza instantly.
Can I run the sync manually?
Yes, on the integration settings page you can click the Sync Now button to run the sync manually. Sync Now works even if the sync status is paused.
Who should I contact if I need assistance?
You can contact our friendly 24/7 Avaza support team via chat or email if you have any questions or require assistance with your integration. Visit us here for details.
8 Comments
What version of QuickBooks on line is needed to interface with Avaza?
Hi Mark 🙂
We integrate with QuickBooks Online via the integrations, and you can export the Transaction Line Item report to import data into QuickBooks Desktop. 🙂
Can you sync expenses and vendors from QuickBooks to Avaza?
Hi Rhoda, not yet but this is on our product roadmap. I will add your vote to our internal feature request so you can be notified once this feature becomes available.
I would like to sync any Expenses created in Avaza to be added as pending bills into Quickbooks – once the reimbursements are approved. Is this sync available?
Hi Sahil, our current integration with Quickbooks doesn’t support the creation of Quickbooks bills from Avaza Expenses, however, this is something we are tracking votes for on our product roadmap. I will add your vote for the relevant feature request. Our team will notify you as soon as it becomes available.
I would also like to see expenses synced to QBO.
Hi – is it possible to sync timesheets with quickbooks so we can pay timesheet users in QB?