Are you sick of not getting paid on time or having to chase customers for overdue payments? There must be a better way. Introducing Avaza Invoice Auto Reminders.
Let Avaza remind your customers of near-due and overdue payments by setting up Automatic Invoice Reminders. Follow the steps below and save yourself time manually chasing up payments.
Step 1: Configure Invoice Automatic Reminders
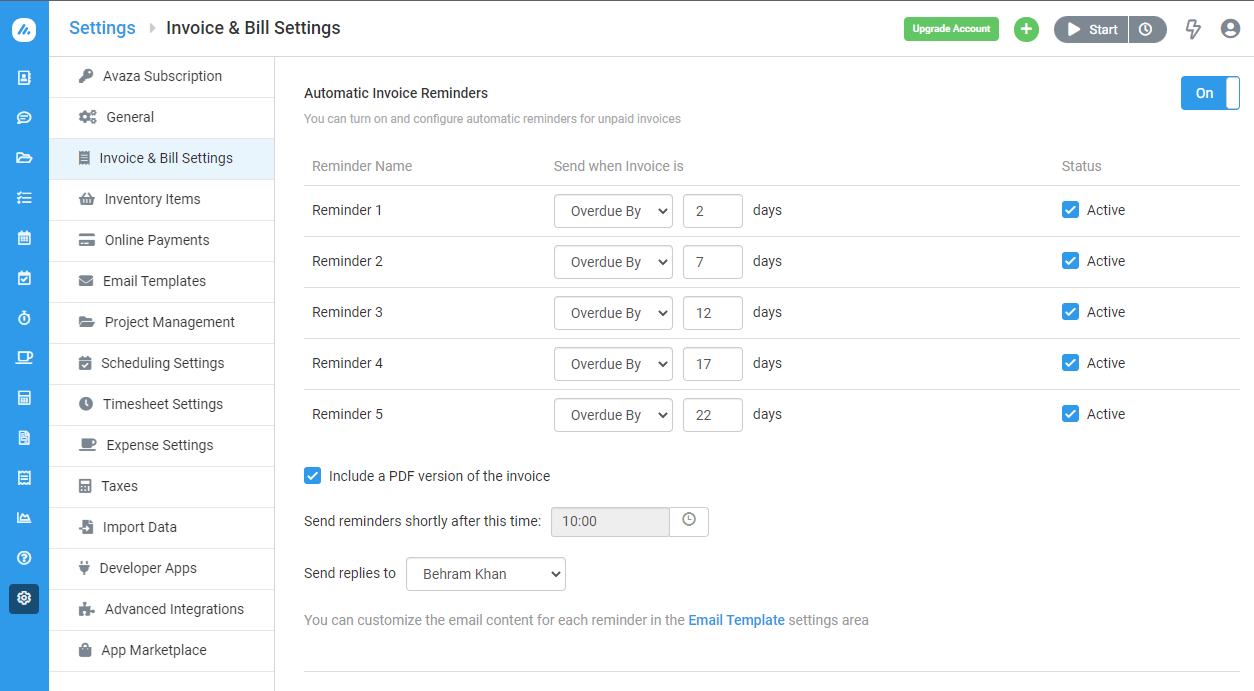
To enable invoice automatic reminders for your account, navigate to Settings > Invoice & Bill Settings page and enable the Automatic Invoice Reminders option. You will see the default settings as per the screenshot below.
Figure - Invoice Auto Reminders Settings Panel
To configure a reminder to be sent a certain number of days before the Due Date select “Due in” from the dropdown and enter the number of days. For example, if you would like to send your first reminder 1 day before the due date select “Due in” and enter 1 in the input box. Similarly to send a reminder a certain number of days after the Due Date select “Overdue By” from the dropdown.
You have the option to include a PDF copy of the invoice, specify the time when the reminder should be sent, and nominate the user who should receive the email replies if your customer decides to reply to the reminder email.
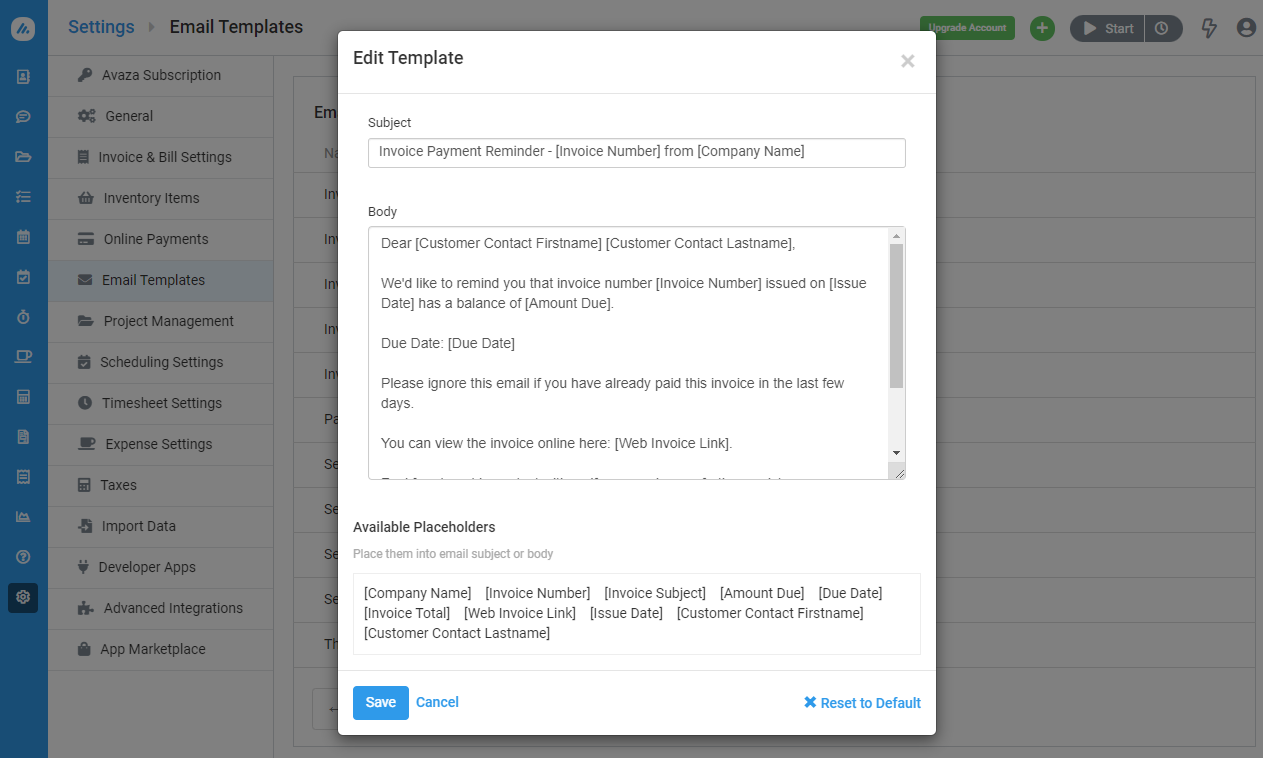
Step 2: Update the content of each invoice reminder email template
Navigate to Settings > Email Templates page. Here you will find 5 Invoice Auto Reminder email templates corresponding to each reminder you have configured in Step 1. You can customize the subject and body of each email template. Make use of the available variables such as Customer Contact Firstname, Web Invoice Link, Invoice Total, and more.
Figure: Invoice Auto Reminder Email Template
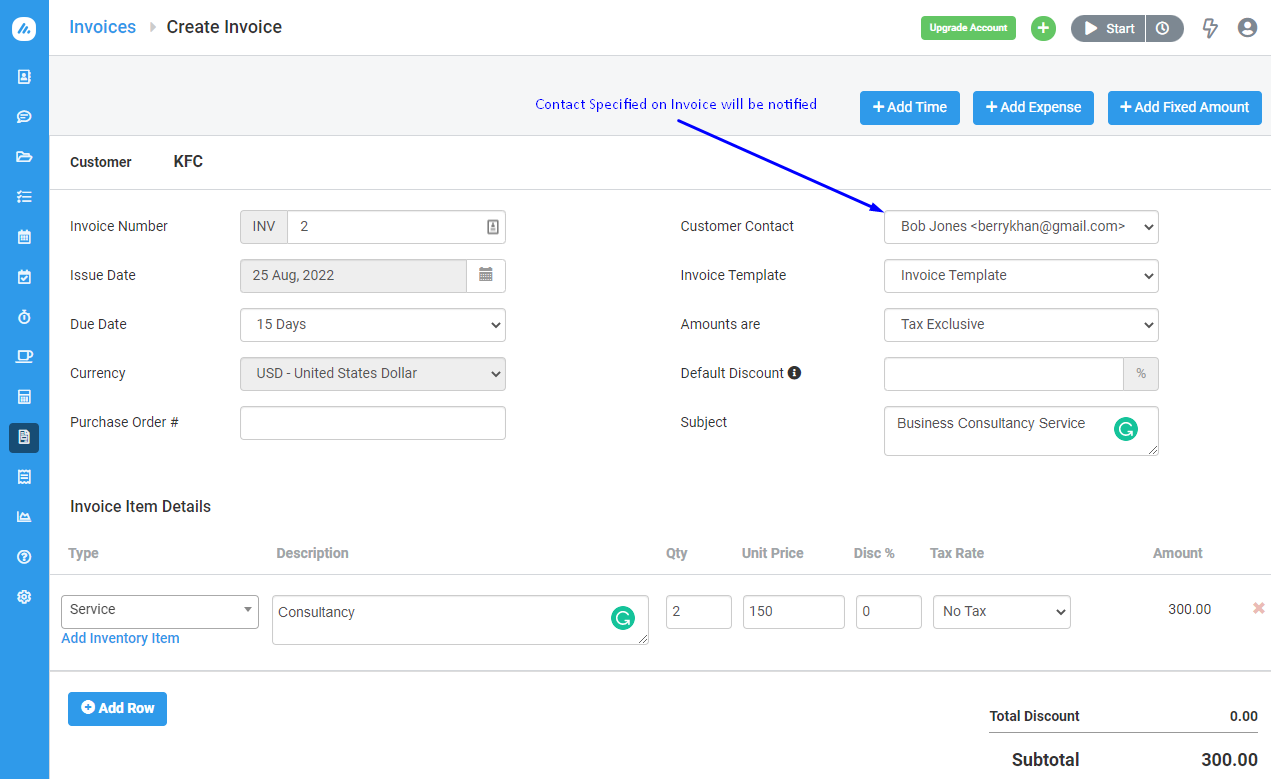
Step 3: Specify a Customer Contact on each Invoice
Now that the invoice reminders are switched on, make sure that any new or existing invoice you would like to send invoice auto reminders for has a customer contact specified. The auto-reminders will be sent to the specified contact on the invoice.
Figure: Specify Customer Contact on Invoice Create Page
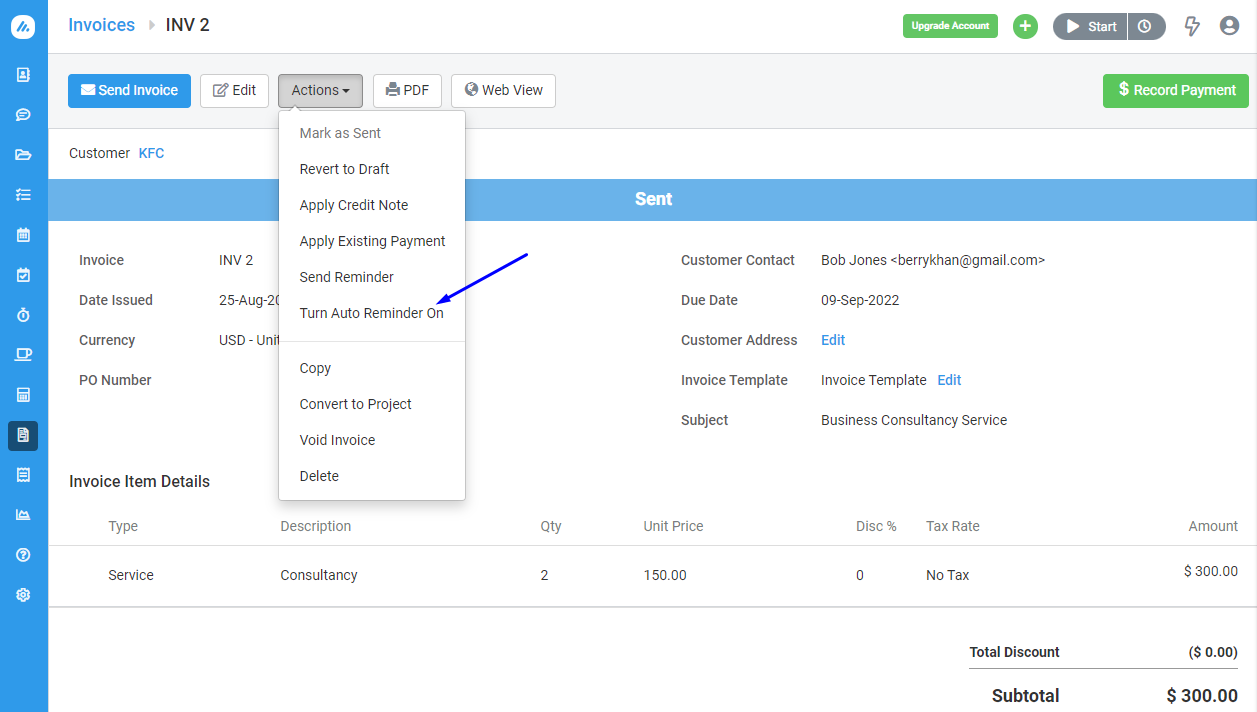
Step 4: Turn Reminder On for existing invoices
To turn Invoice Auto Reminders On or Off on any existing invoice, open the invoice and from the Invoice Details page, click the Actions dropdown and select the available auto reminder option.
Figure: Action Dropdown on Invoice Details Page
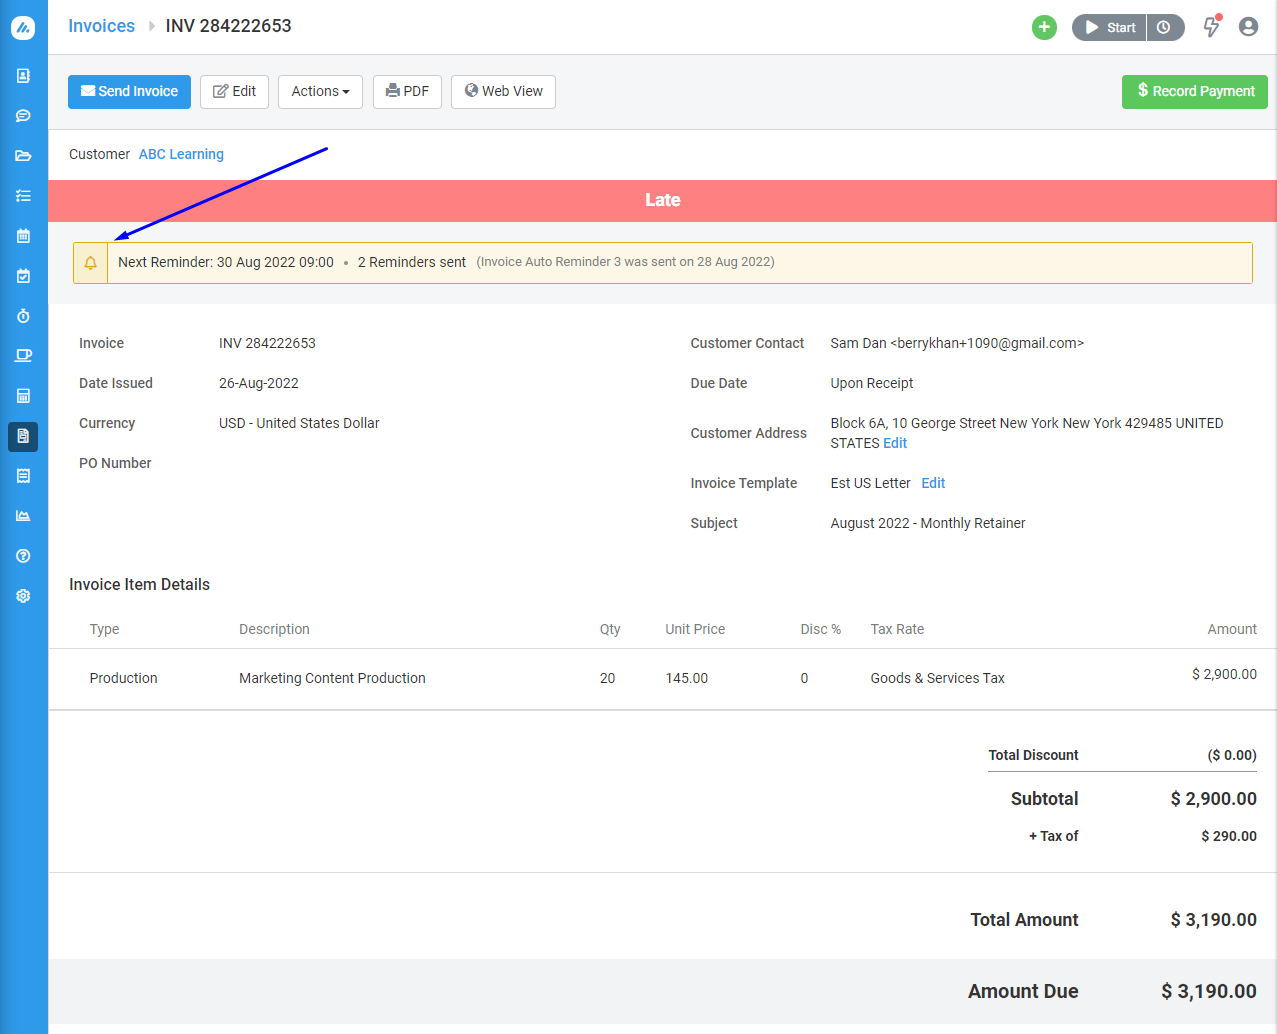
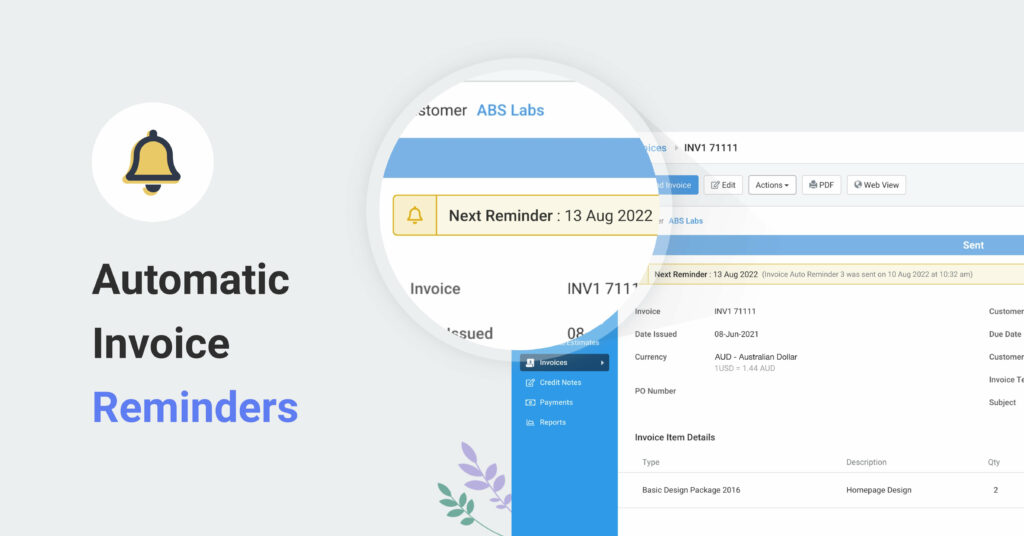
Please note that the Invoice Auto Reminders option is only available for invoices in the status of Sent, Late, or Partially Paid. An info bar with useful information is also displayed on invoices with enabled Auto Reminders as per the image below.
Figure: Invoice Details Page Auto Reminder Info Bar
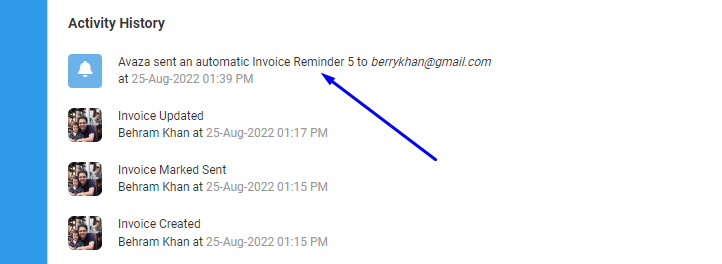
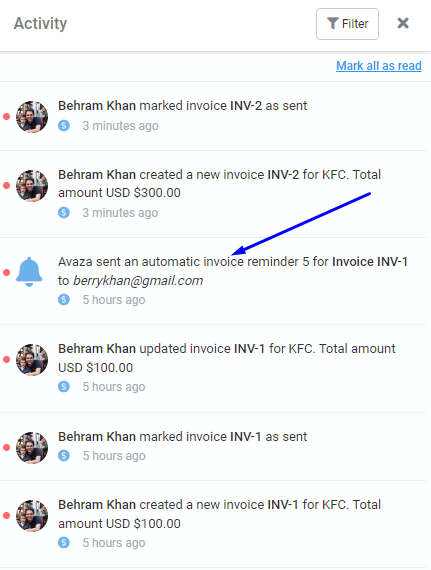
The Invoice Activity History section and User Activity panel list each Invoice Auto Reminder that has been sent thus far.
Figure: Invoice Details Activity History Panel
Figure: Invoice Auto Reminder Event on User Activity Panel
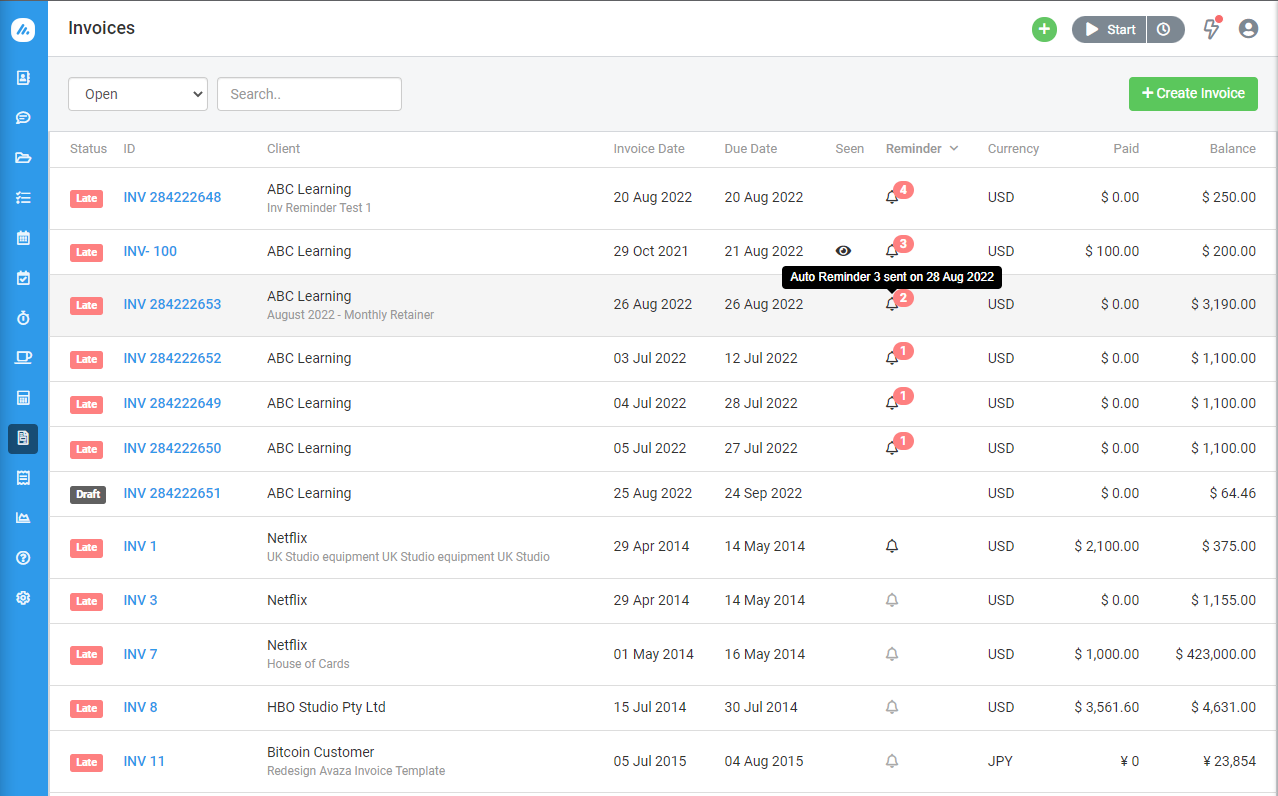
A reminder column is introduced on the Invoice List page to indicate the auto reminder status. Invoices enabled for auto reminders display the count of sent reminders and upon mouseover the last reminder number. A handy feature to easily check the auto reminder status of your invoices.
Figure: Reminder Column on Invoice List Page
With invoice reminders set up, your customers are more likely to pay sooner and you won’t have to waste time manually chasing overdue payments.
We hope you find this new feature useful and look forward to your feedback.