Since this article was published, we have updated our Recurring Expenses feature. You can get updated information here.
The good news keeps rolling in. We now have a cool new feature to rev up Avaza’s Expense module: Recurring Expenses, that allows you to automate the process of filing expenses that you incur on a repeated basis, for instance rent, web hosting and subscriptions of any nature.
We love automating your menial tasks so your business can focus on the cool stuff it does!
How do I create a Recurring Expense?
Creating a recurring expense is easy! You will see a new option under Time & Expense main menu called “Recurring Expenses”. From this page you can view existing recurring expenses or create new ones.
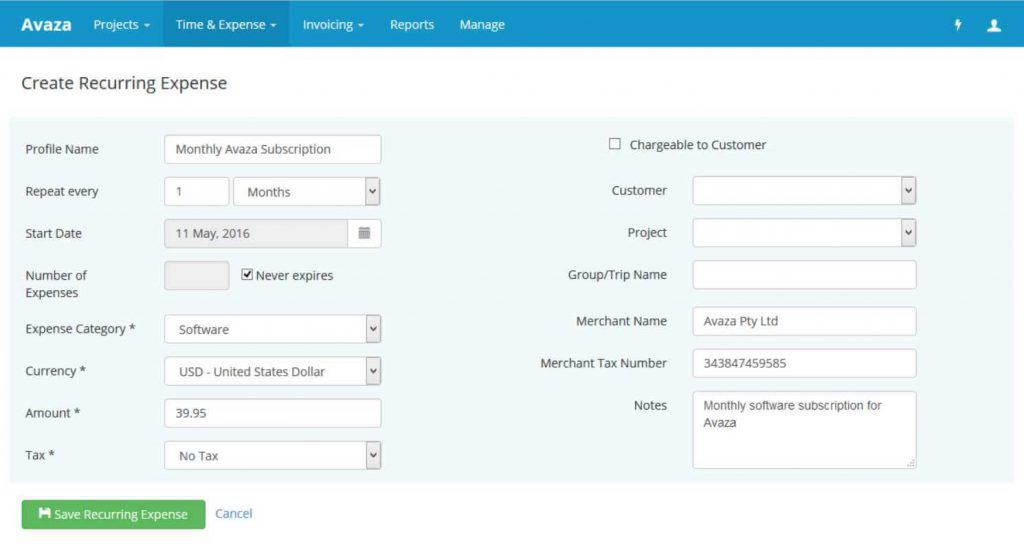
- Click the Create button to start creating your first recurring expense. On the create page you will need to enter the details for the following fields.
- Profile Name: Enter a name that will assist you identify a particular recurring expense. For example Monthly Avaza Subscription.
- Repeat Every: Here you can select at what frequency the expense should be generated. For a monthly subscription you can select every 1 month however you can also define the frequency in terms of days.
- Start Date: Select the date when the first expense will be generated. This date must be today or in the future.
- Number of Expenses: Enter the number of expenses that you want this profile to create. For example if you have a 12 month contract you can set the number of expenses to 12. If the expense has no fixed term then you can select the “Never expires” checkbox.
- Other fields are the same as when creating a standard expense such as Expense Category, Currency, Amount, Tax and others. Please enter the relevant values in those fields and click Save Recurring Expense button. Voila! We have our first recurring expense.
Recurring Expense – Create - The recurring expense detail page displays all the important information such as
- Frequency & Number of remaining expenses
- Start on: The date the profile started
- Last created: The date when the last expense was created by this recurring profile
- Next expense: The date the next expense will be created.

Recurring Expense – Details - Associated Expenses: The count of expenses that are created by this profile. You can click the number to view all the related expenses. This is handy if you want to get a specific expense generated by this profile.
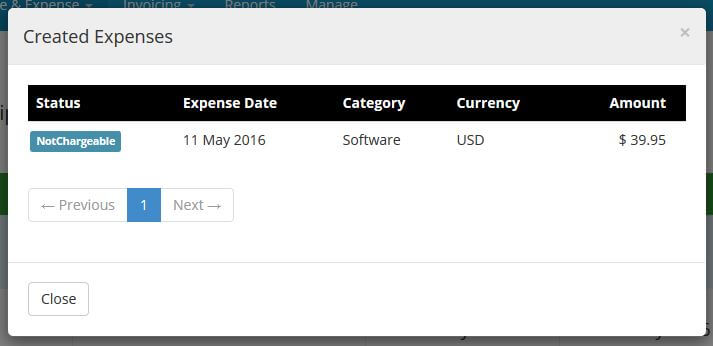
Linked Expenses


The recurring expense detail page also allows you to make changes or even delete the profile. Depending on the status of the profile it can be stopped or resumed as well.
The profile can exist in one of the following statuses, and you can filter the recurring expense list accordingly.
- Active – The profile is scheduled to generate at least one or more expense.
- Stopped – The profile has been stopped. It will not generate any further expenses.
- Expired – The profile has zero remaining expenses. No further expenses will be generated.
What time is your recurring expense created?
You can decide the time the expenses are generated by navigating to Settings Cog [icon color=”Extra-Color-3″ animation_speed=”Slow” size=”tiny” icon_size=”” animation_delay=”” image=”fa-cog”] > Expense Settings and updating the Recurring expense generation time field. By default this value is set to 10:00 am local time of your account’s time zone.

We hope this recurring expense module saves you a whole lot of trouble and time.
Looking forward to your feedback!